
This post is about software distribution with Microsoft Endpoint Manager (aka Intune) and how it works in practice. In my previous article on Windows Autopilot Deployment, I already showed you how to register Windows clients in Intune (of course, you can also do this manually without Autopilot).
With a modern infrastructure that resides largely in the cloud, software distribution works differently. There is no longer a need for a local server to perform software distribution. A classic example in the Windows world is the System Center Configuration Manager (SCCM). How does software distribution work if you don’t want to run a separate server (whether on-premises or even in the cloud) for it? That’s what software distribution with Microsoft Endpoint Manager is for. In this article, I’ll show you a few common scenarios that can be used in any number of ways.
First, we need appropriate licenses in our Microsoft tenant. Intune is included in the following plans:
- Microsoft 365 E5
- Microsoft 365 E3
- Enterprise Mobility + Security E5
- Enterprise Mobility + Security E3
- Microsoft 365 Business Premium
- Microsoft 365 F1
- Microsoft 365 F3
- Microsoft 365 Government G5
- Microsoft 365 Government G3
- Intune for Education
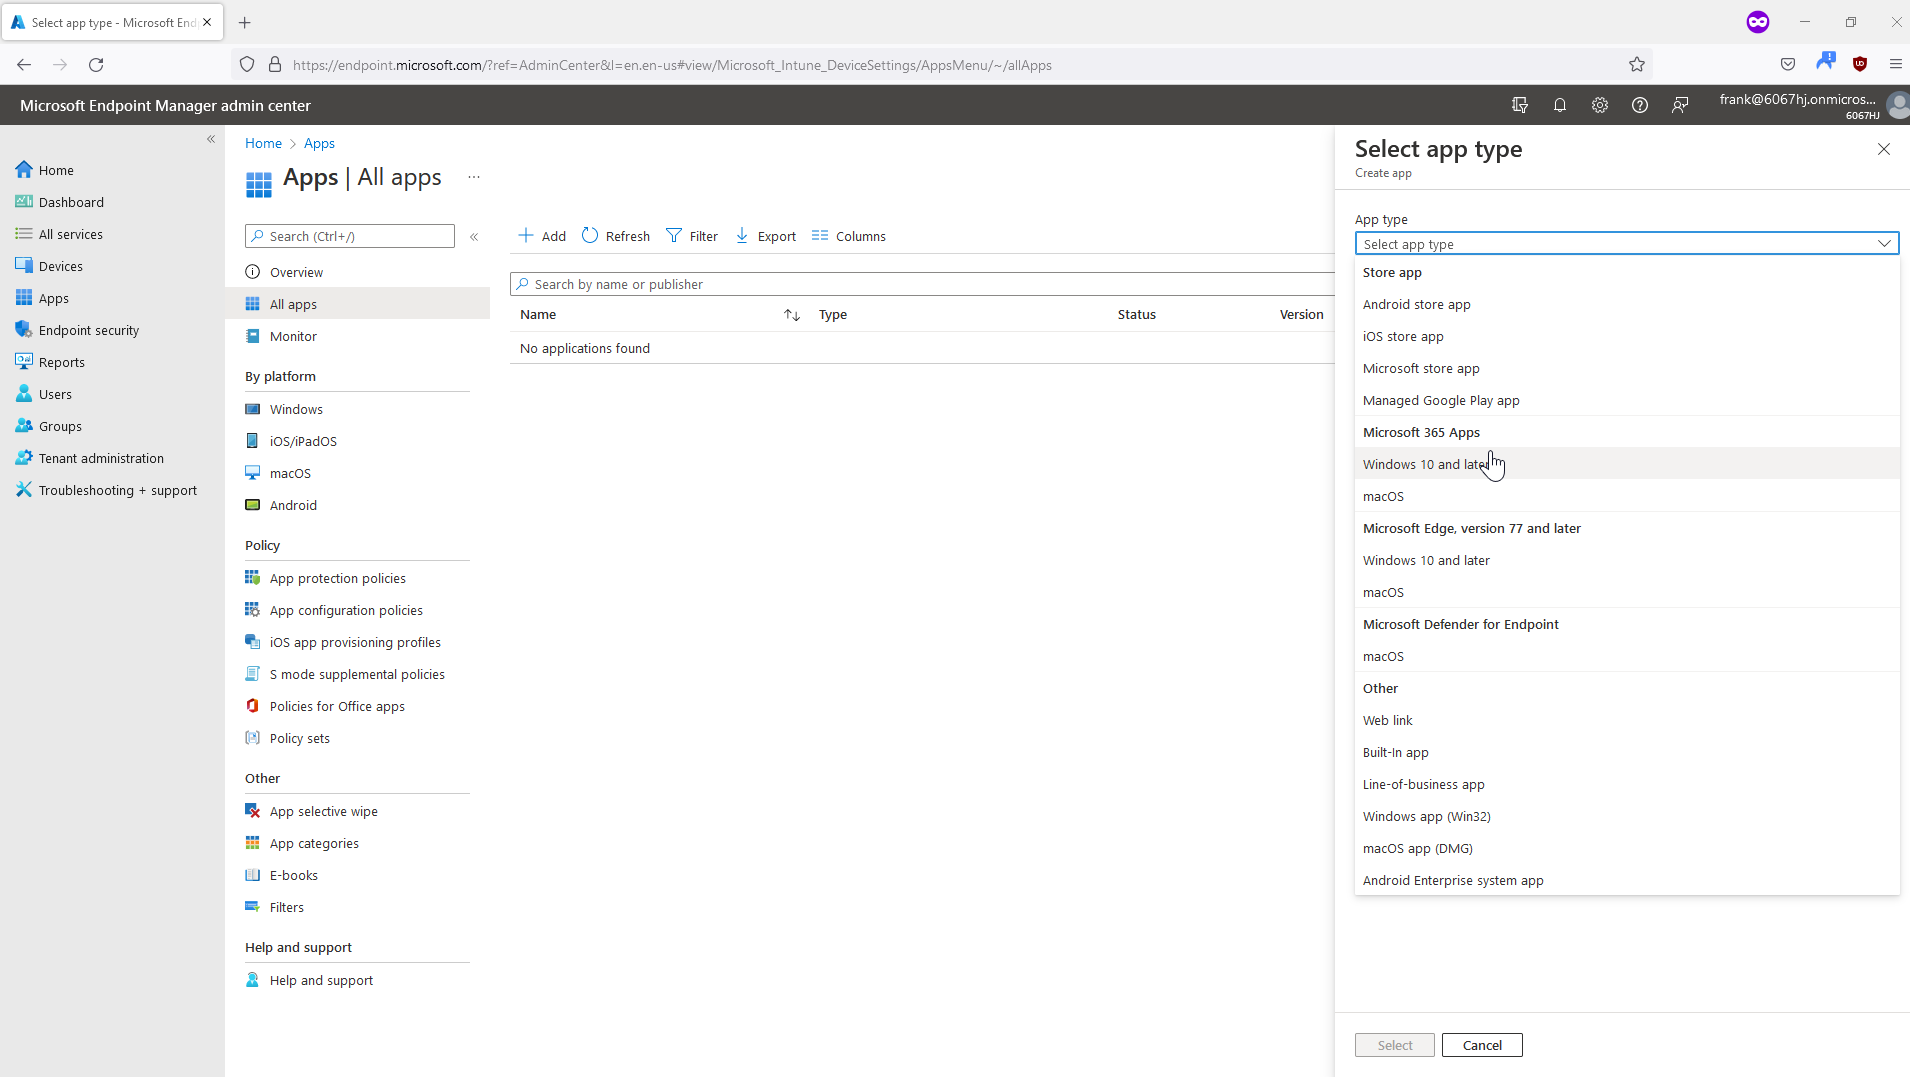
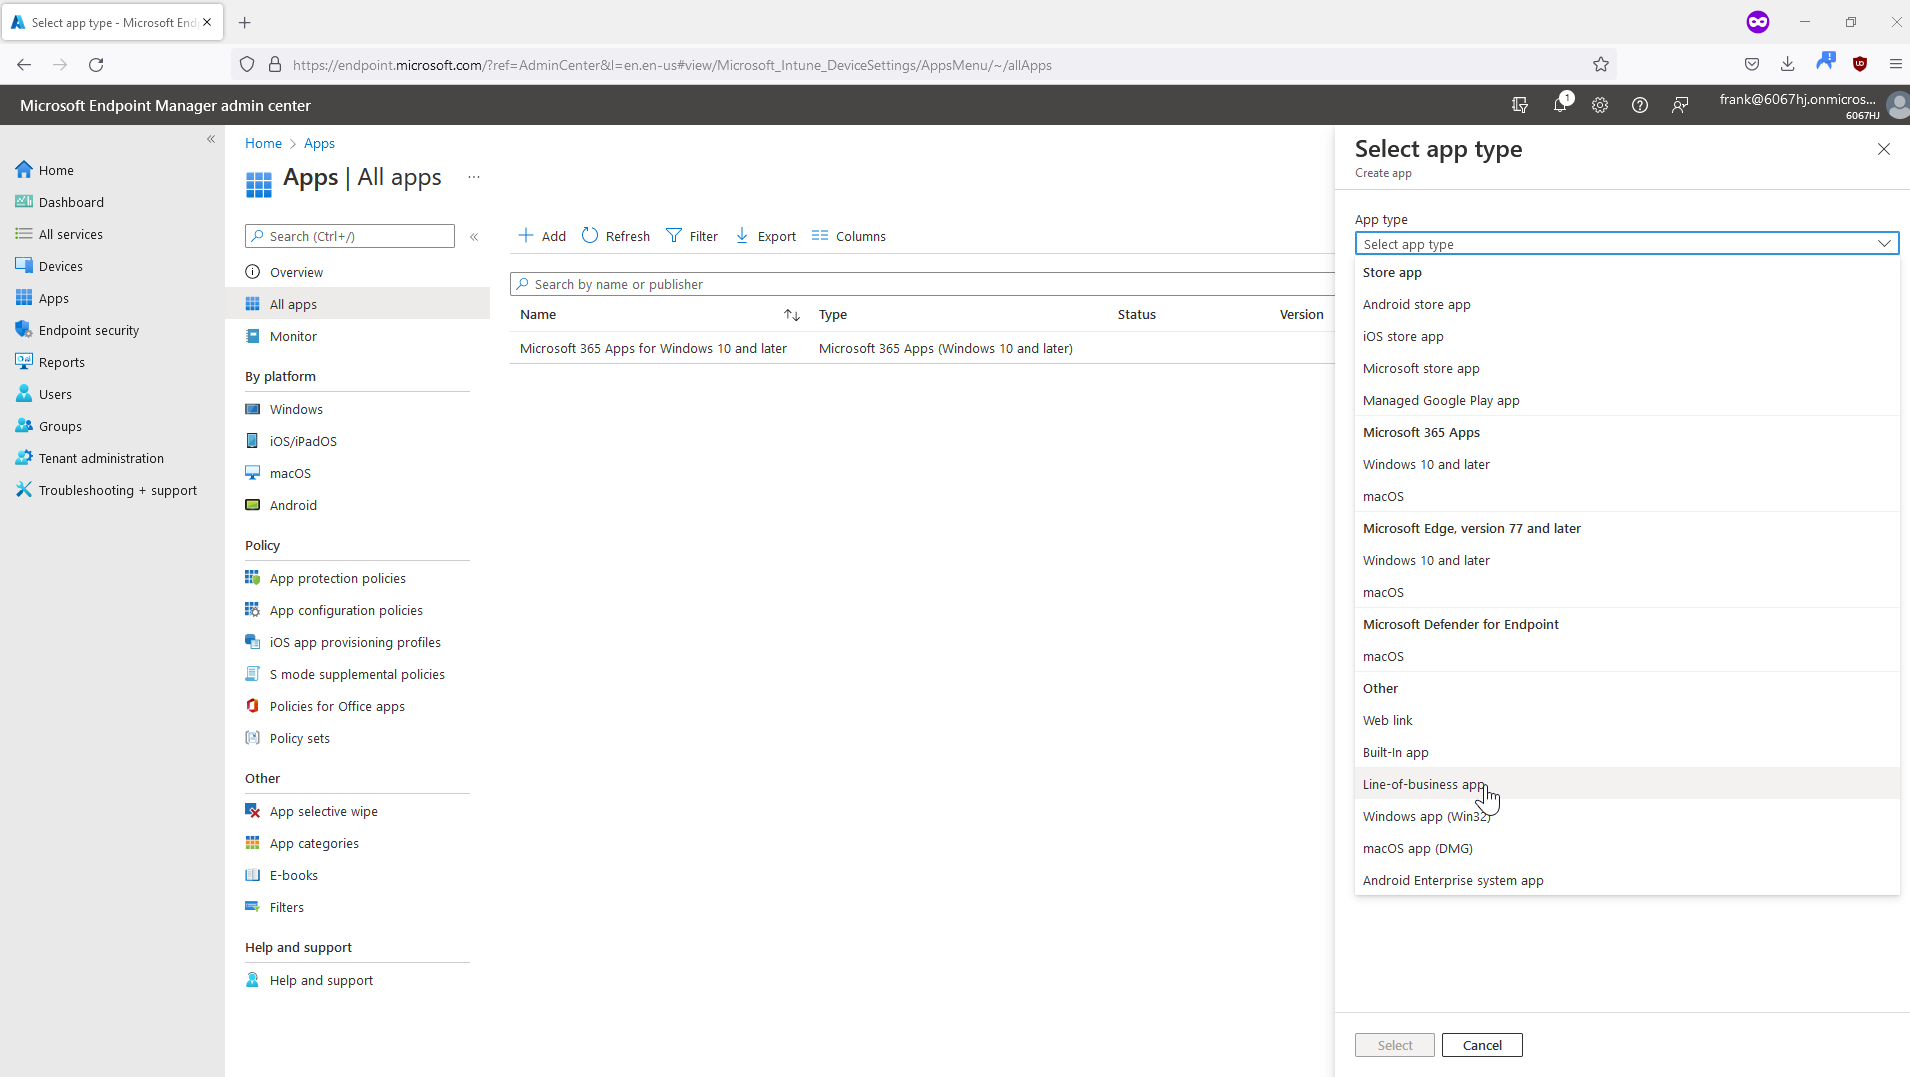
In general, we can distinguish three different types of software, which must also be taken into account when deploying software with Microsoft Intune:
- Microsoft 365 Apps (Windows 10 and later)
- Windows MSI line-of-business app
- Windows app (Win32)
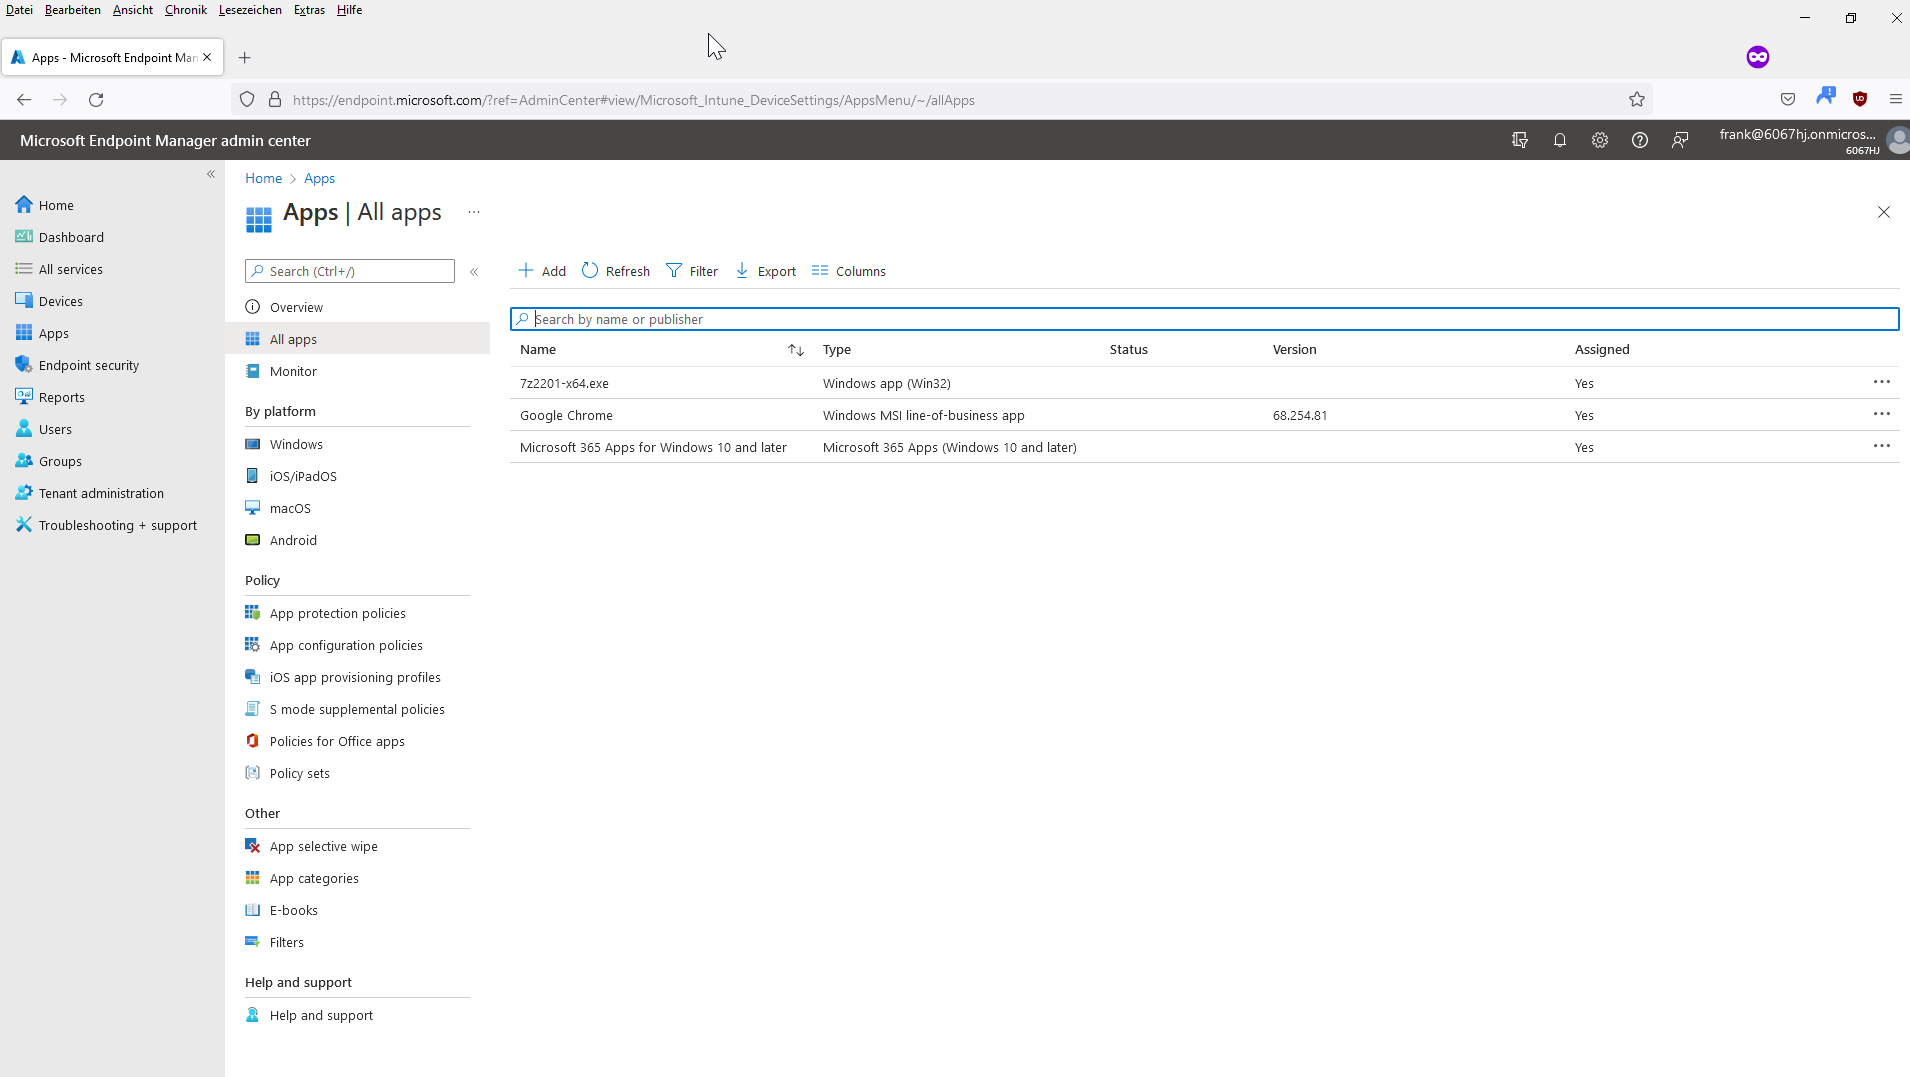
In this post, we will install Microsoft 365 Apps, Google Chrome and 7-Zip.
Microsoft 365 Apps
Deploying Office 365 software to clients is very easy with Microsoft Intune.
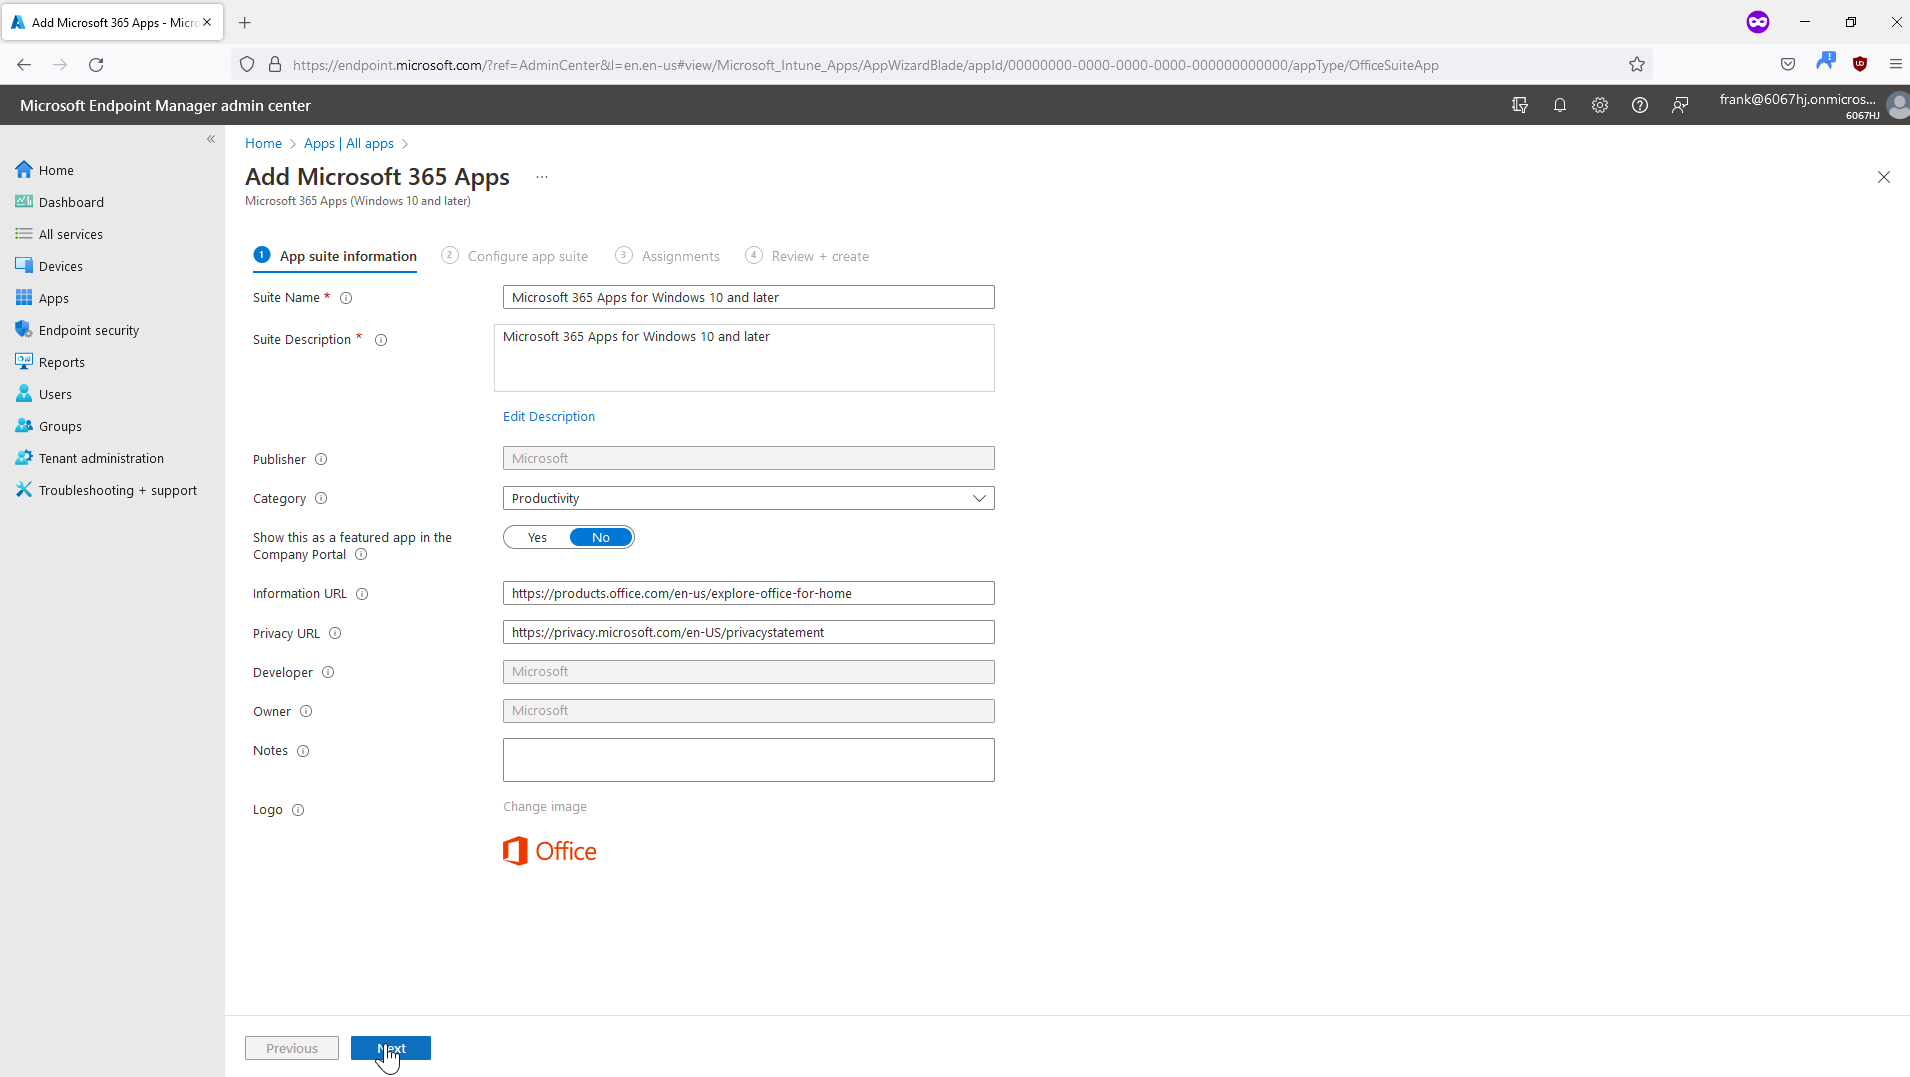
For this purpose, we add a corresponding client app of the Microsoft 365 Apps type.
After that, we can first make a few basic settings, such as the name of the app and a description.
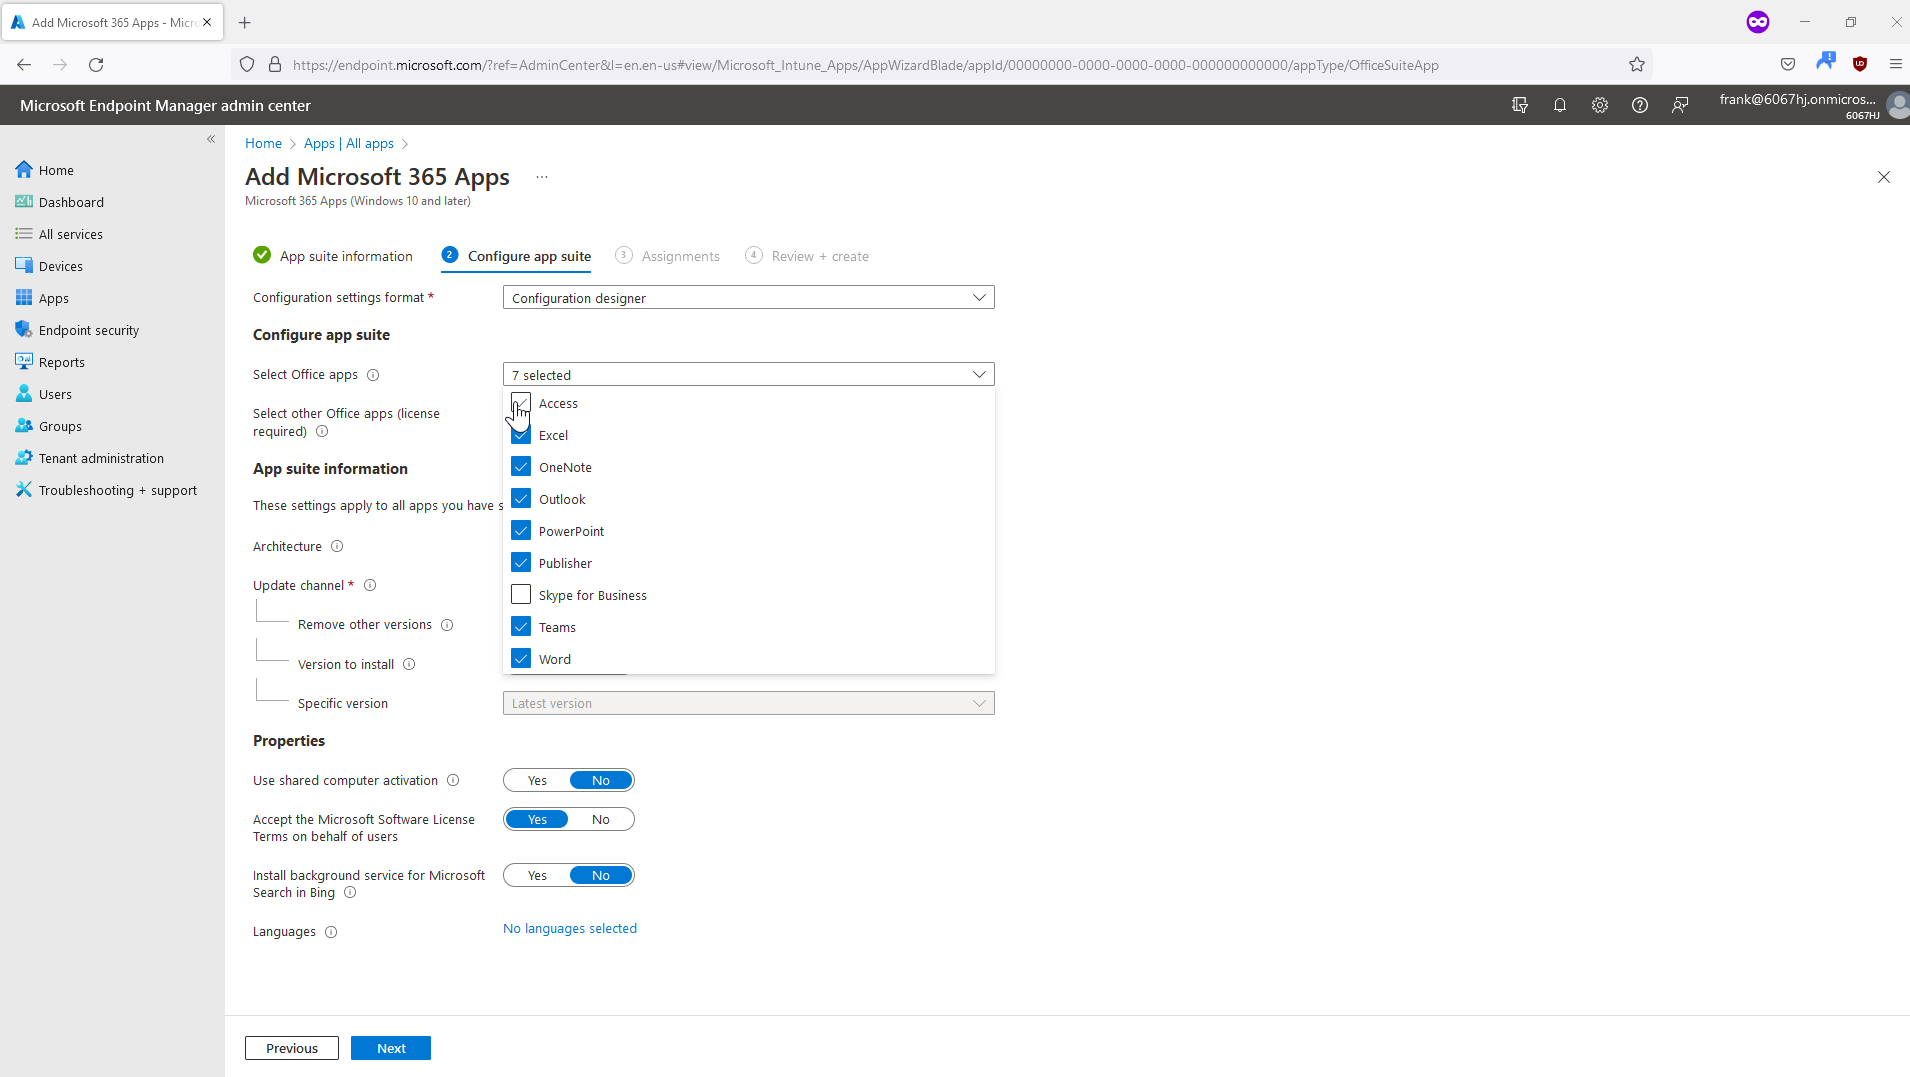
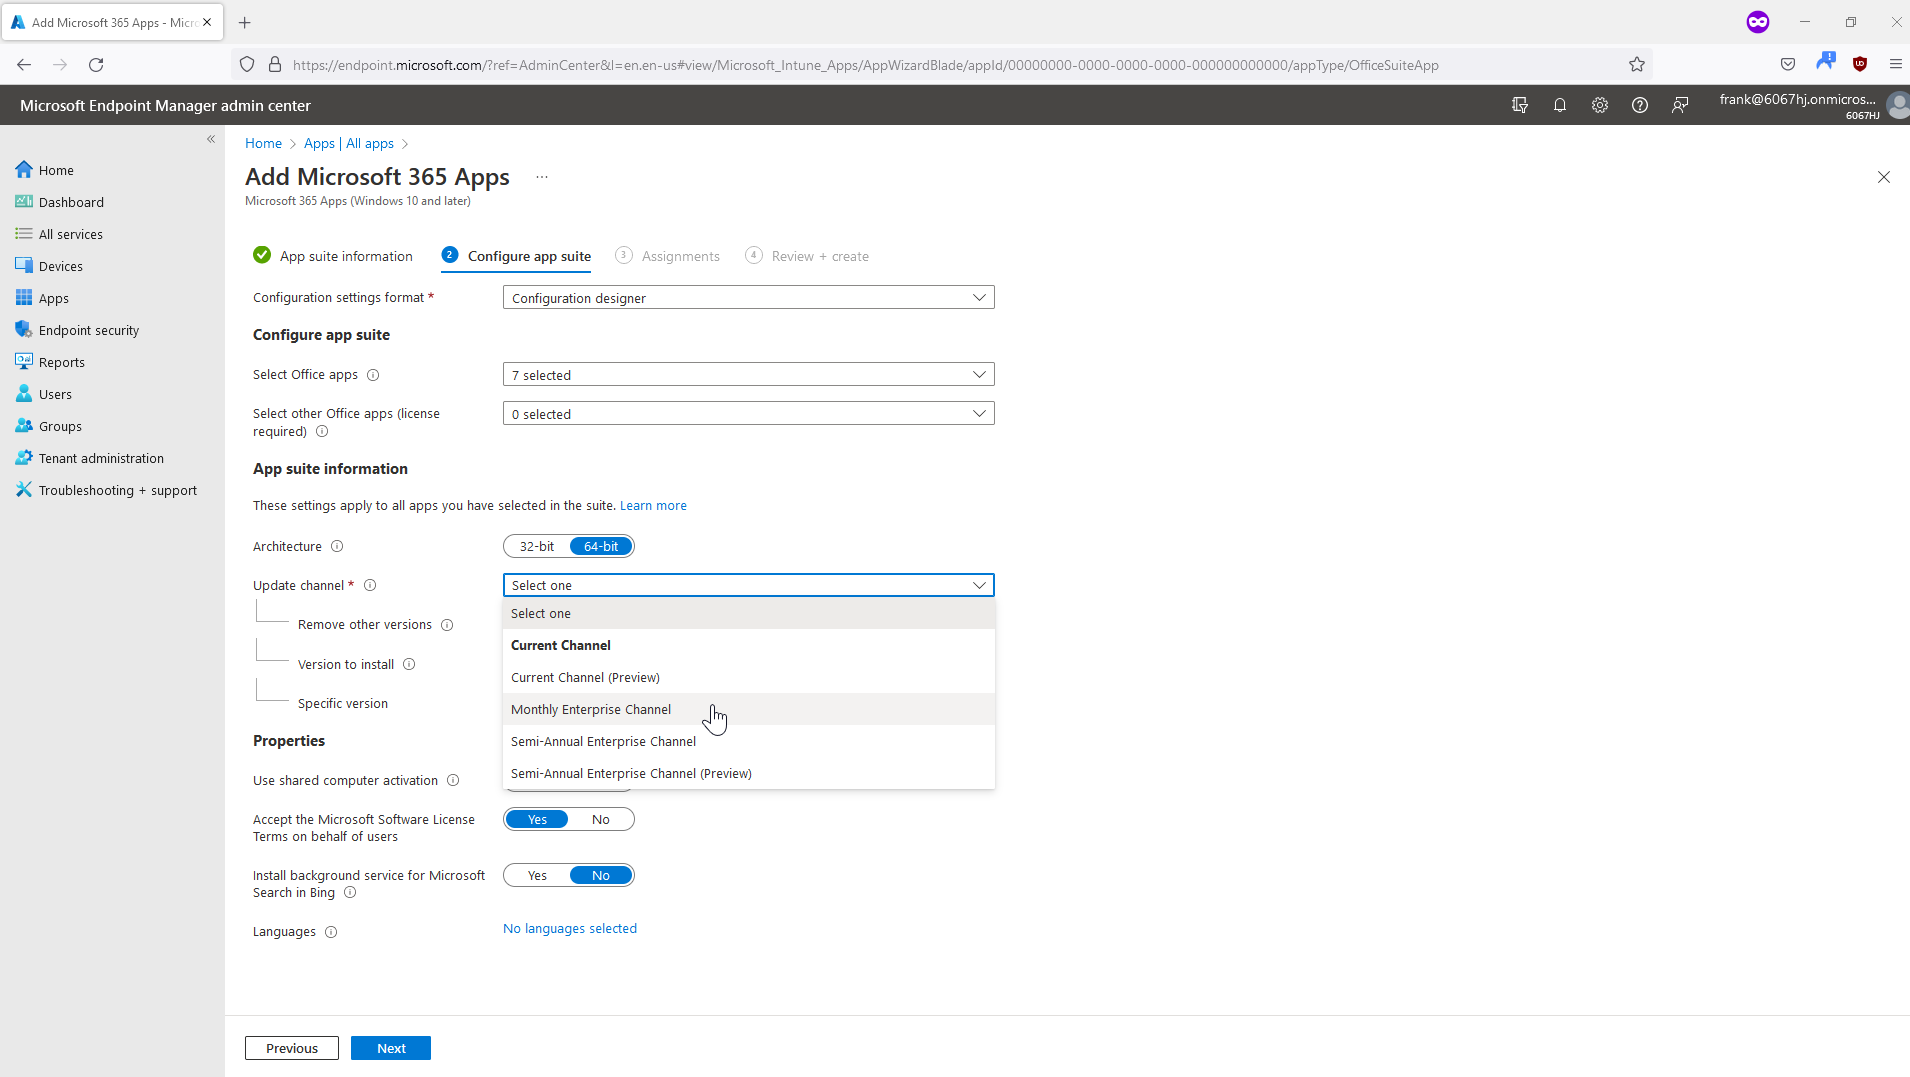
In the next step, we can configure the Microsoft 365 Apps. That is, exactly which programs are to be installed. This is not possible with a Click 2 Run installation of Microsoft 365 Apps. For this, you would need at least the Office Deployment Tool (but we do it “modern” with Microsoft Intune). To clarify, we do not install Microsoft Access with it because our users do not use it.
Next, a few basic settings need to be made, such as the frequency of updates to be installed and the language of the Microsoft 365 Apps.
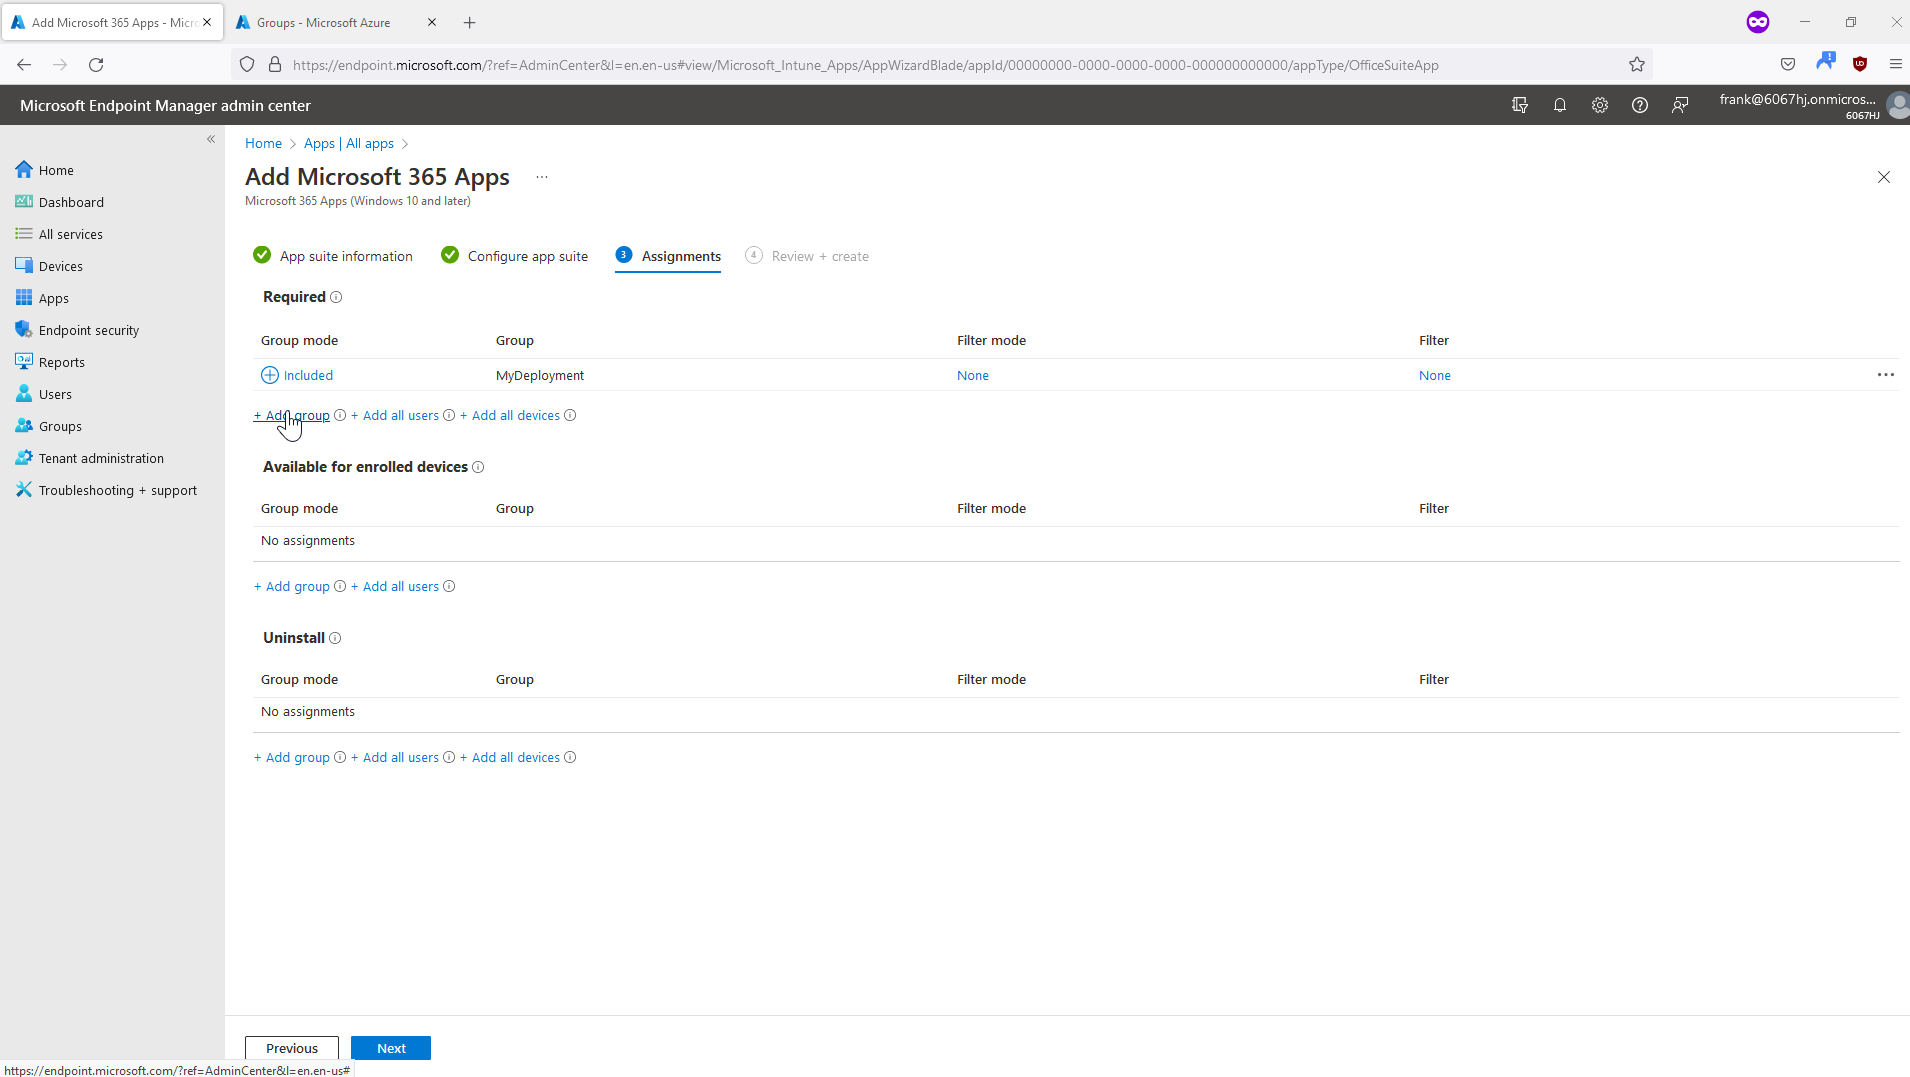
With this, the configuration of the app is already done, and we only need to assign it to users or devices.
As a last step, a summary of our configuration is displayed and then the app can be created.

And already the software distribution of the Microsoft 365 Apps is running…
Windows MSI line-of-business app
This section is about installing MSI files. As an example, we will use the Google Chrome (Enterprise) browser. So we download the MSI file and add another app.
The rest of the steps are quite similar to those from the previous section.
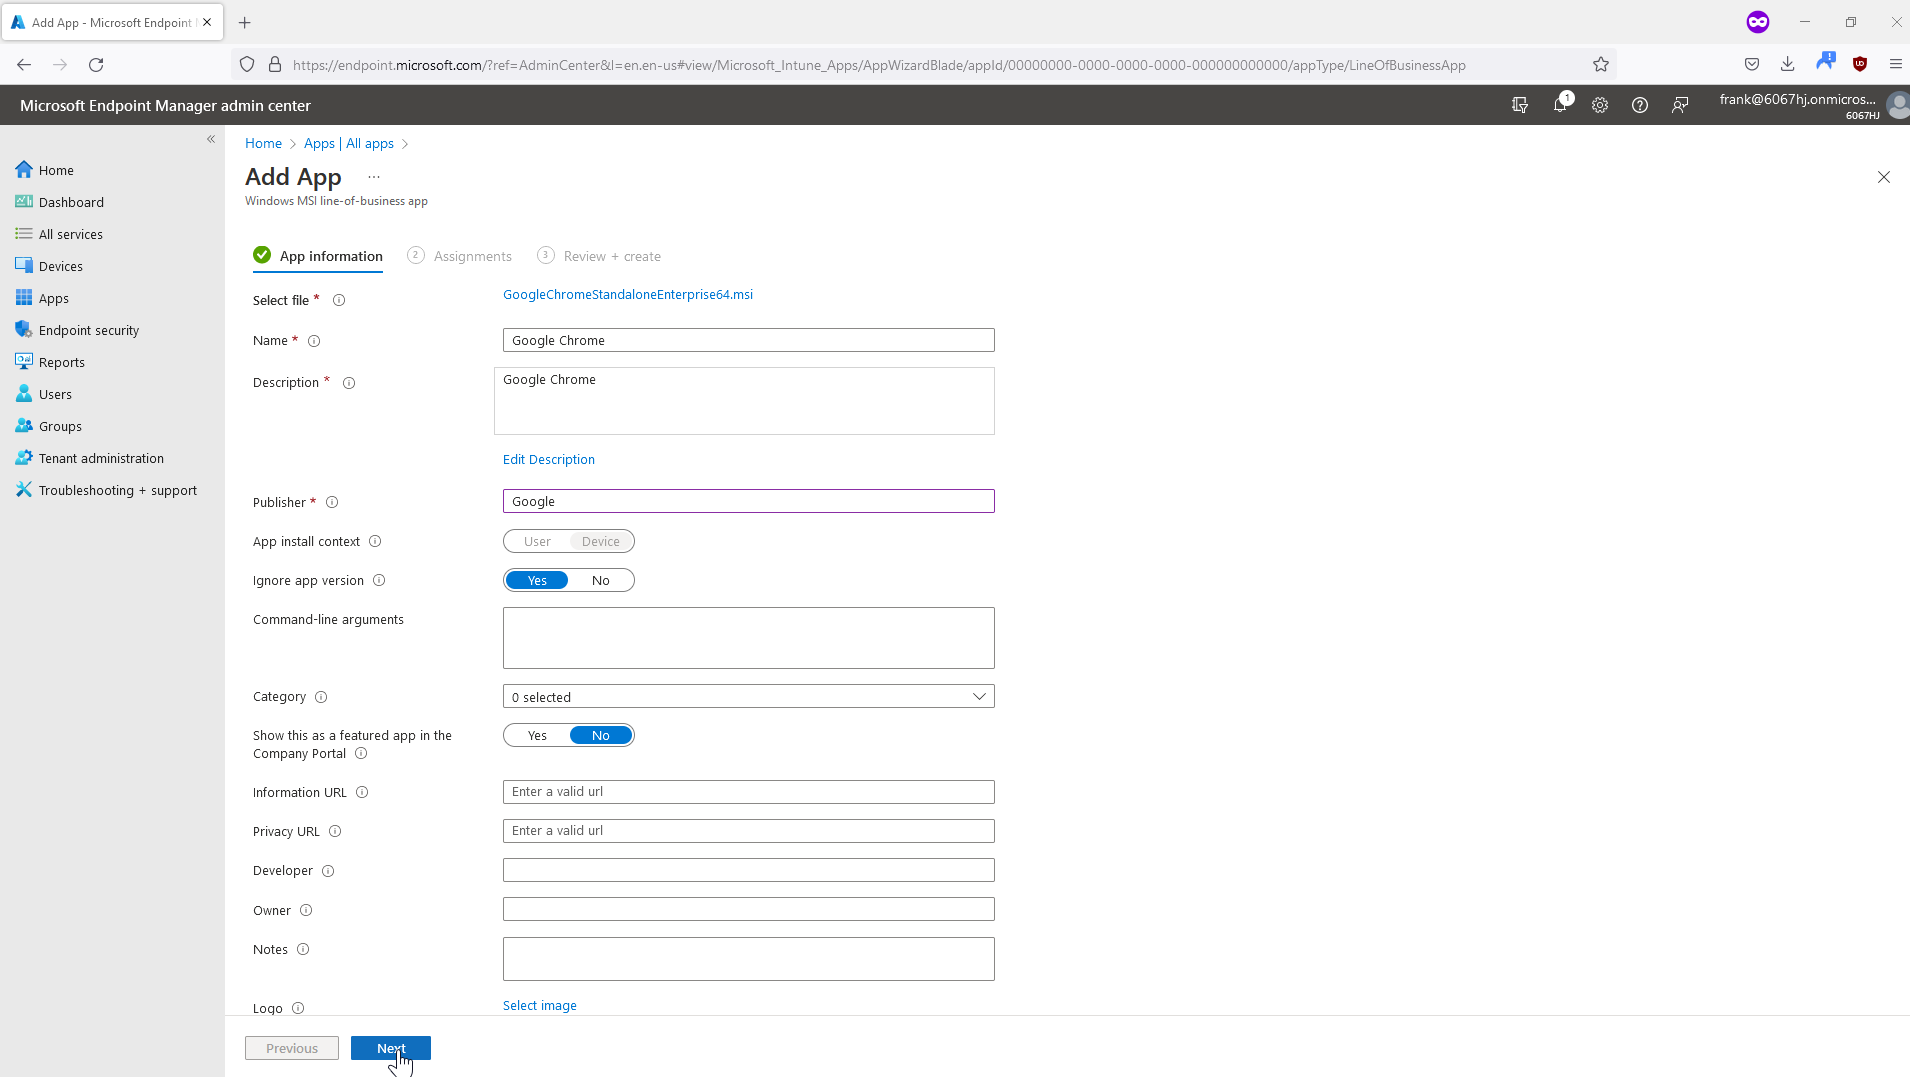
In this case, we first upload the MSI file and automatically see some meta information read from the file.

After that, we still need to complete some information of the app, such as the name and description.
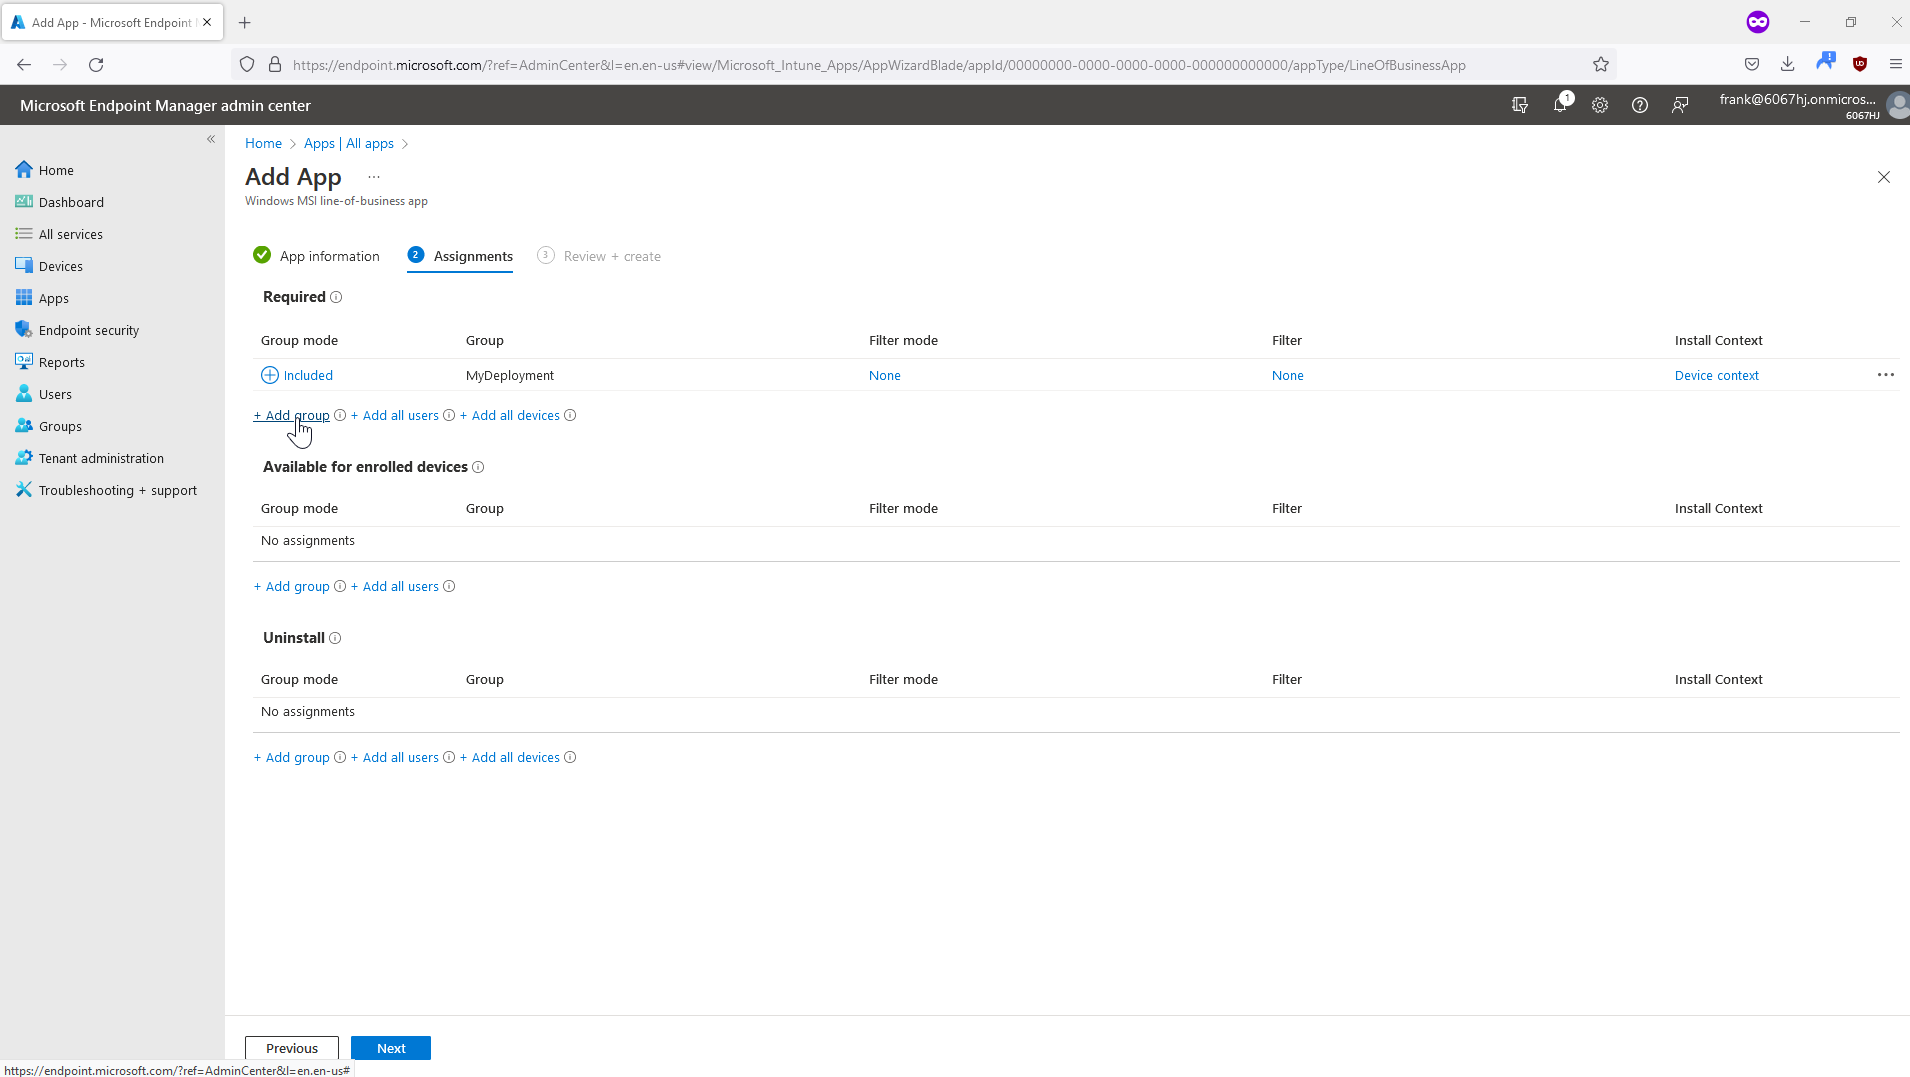
Then Chrome also needs to be reassigned to users or devices.
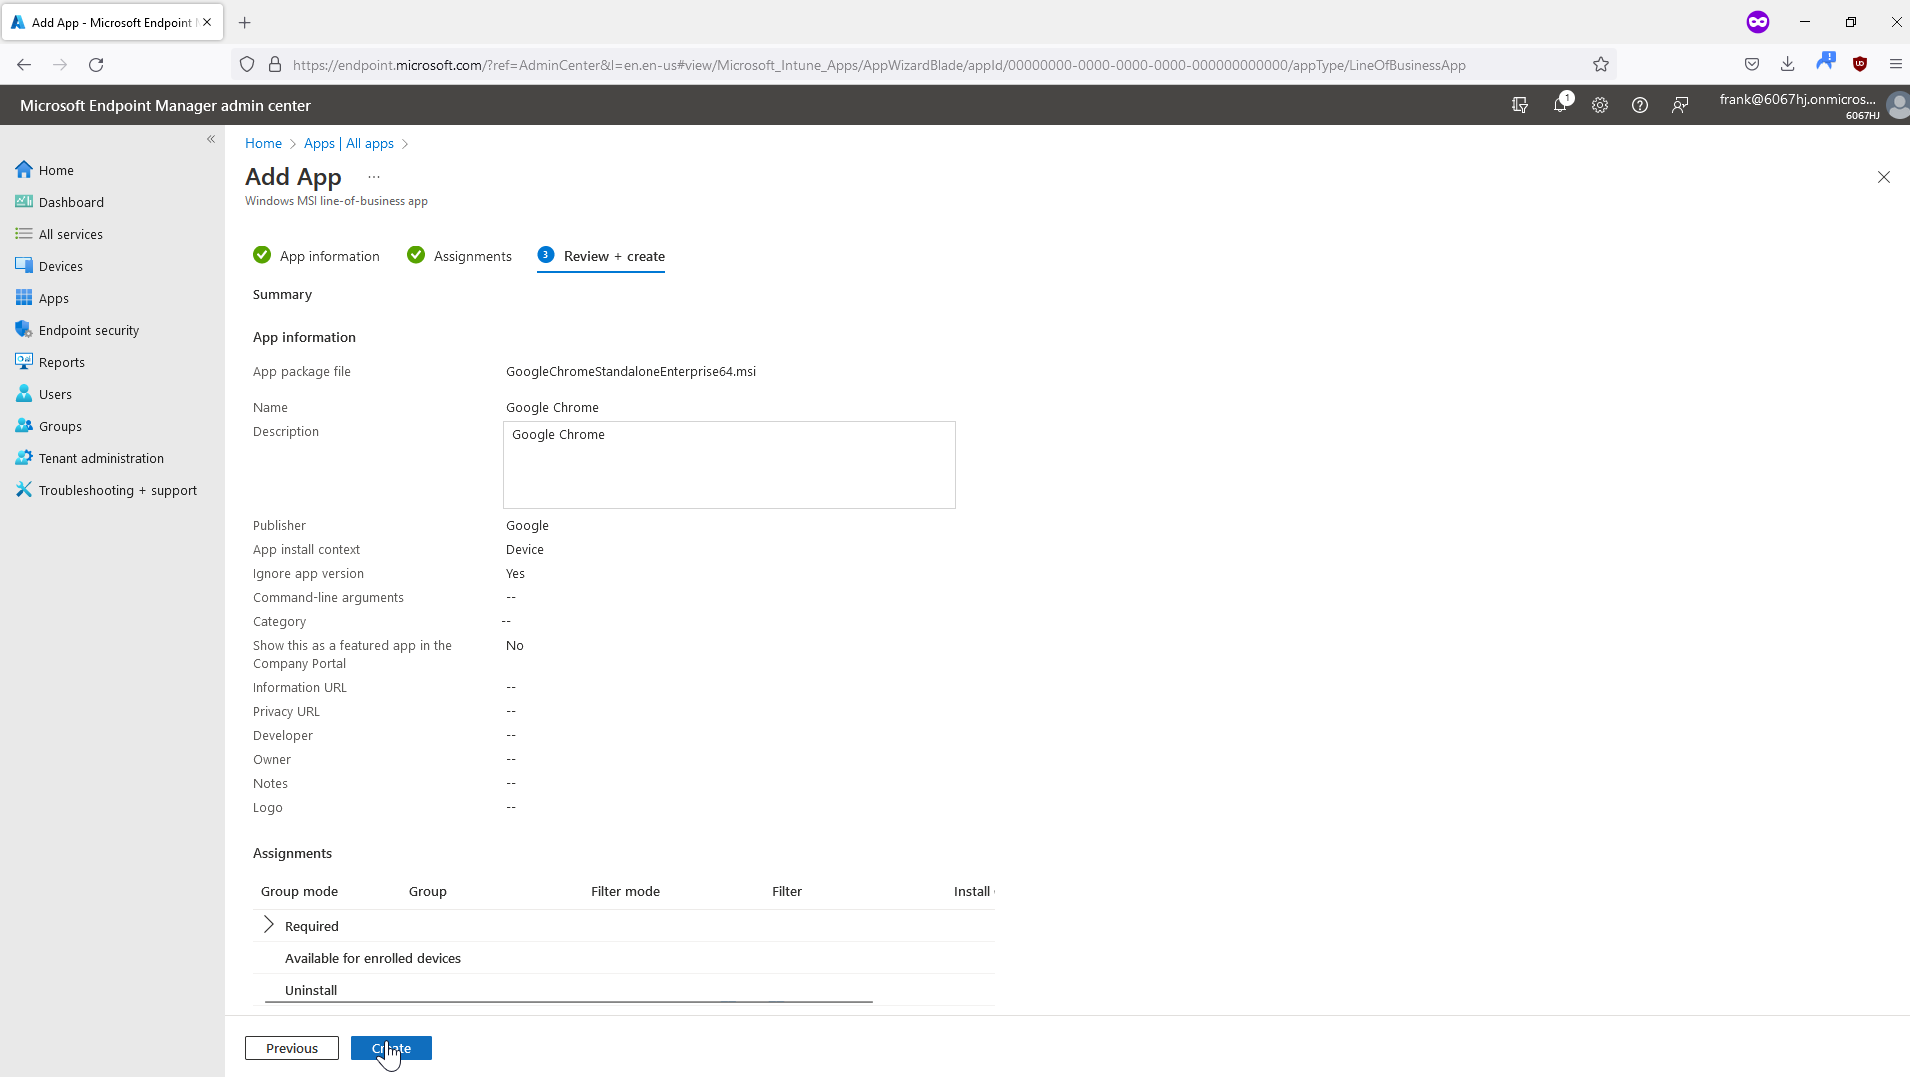
Again, a summary of the configuration will come first before we can create the app.
After the app/file has to be uploaded first, it can take a short moment until the provisioning is done.
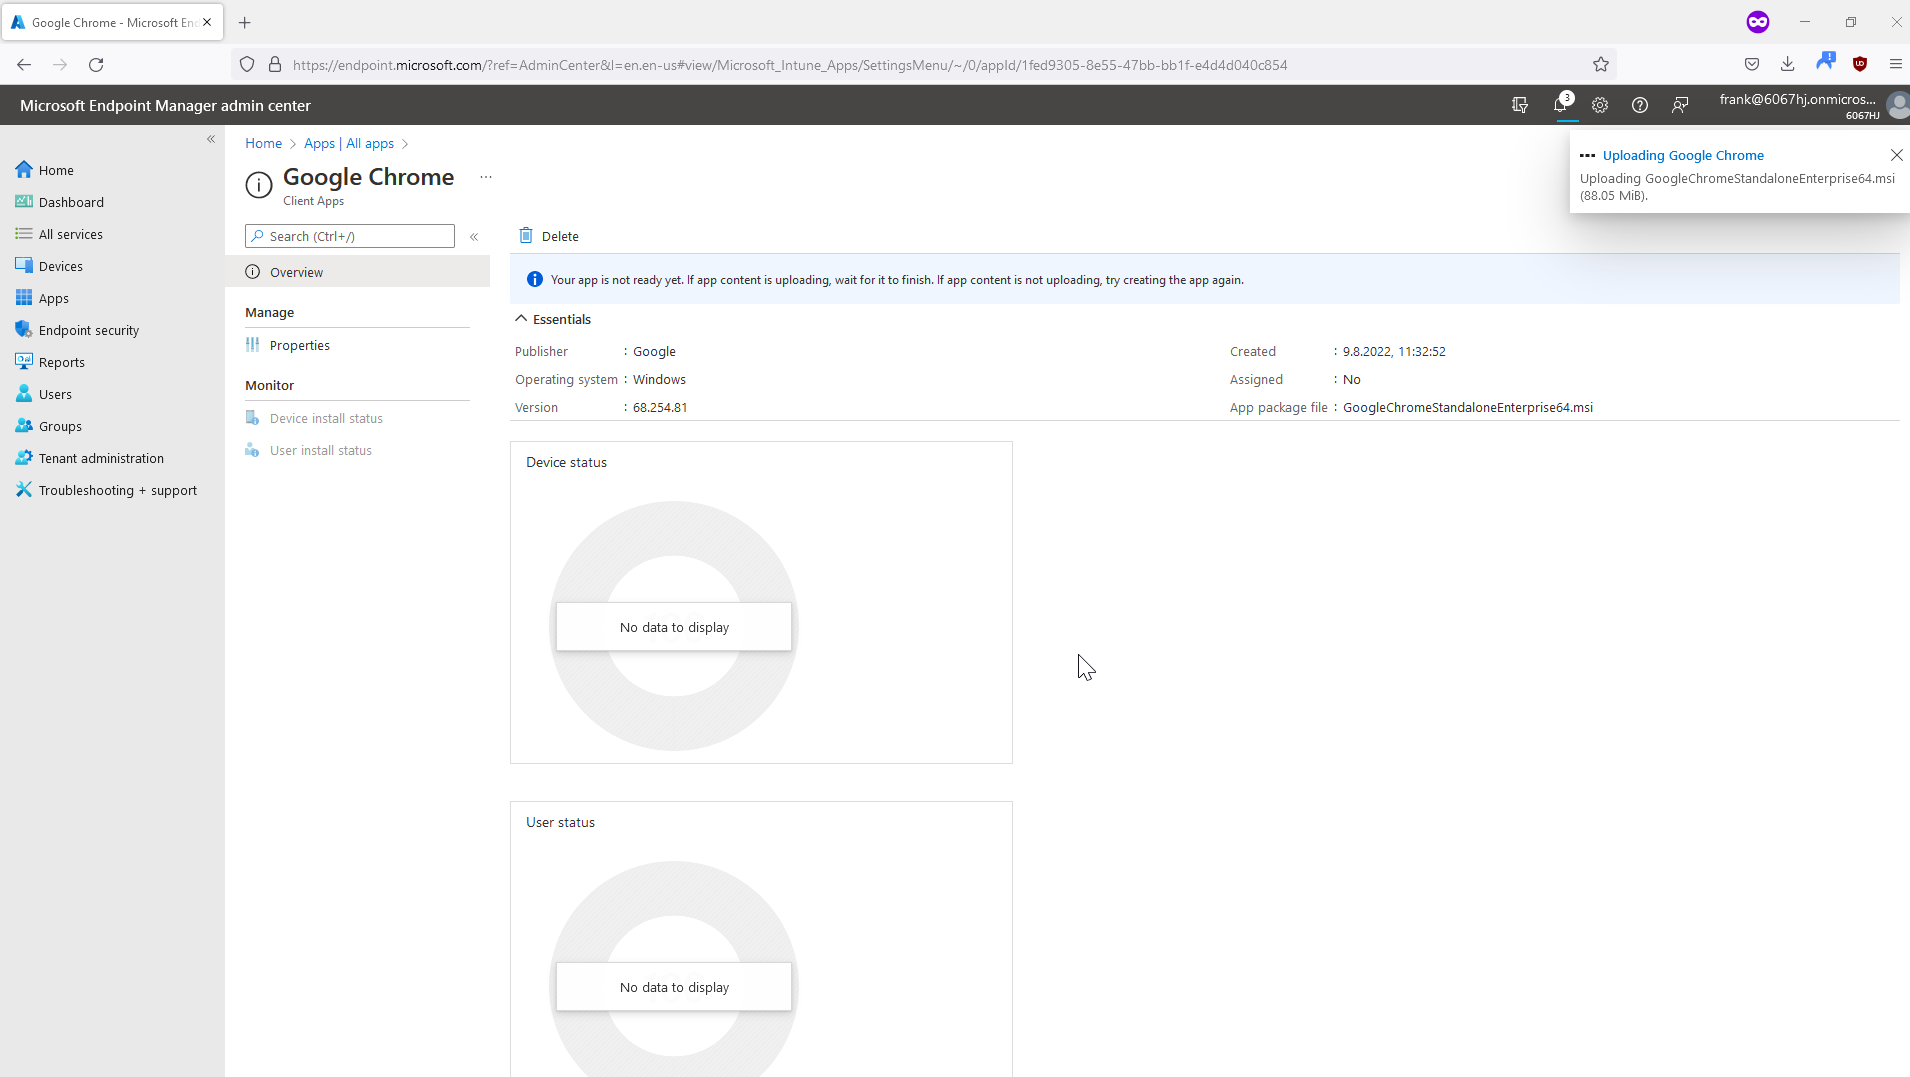
After the upload, Chrome is already rolled out via Microsoft Endpoint Manager. 🙂
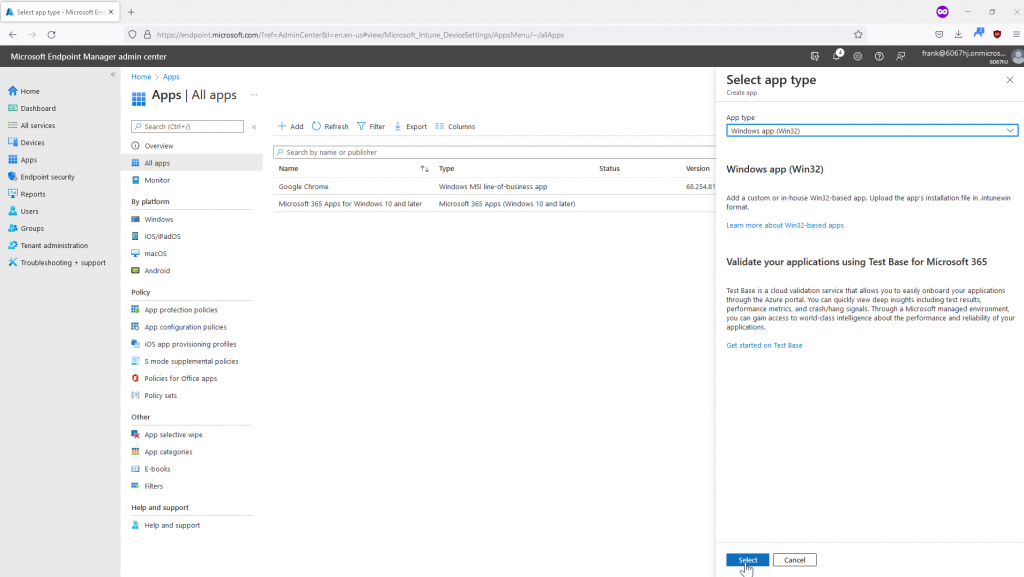
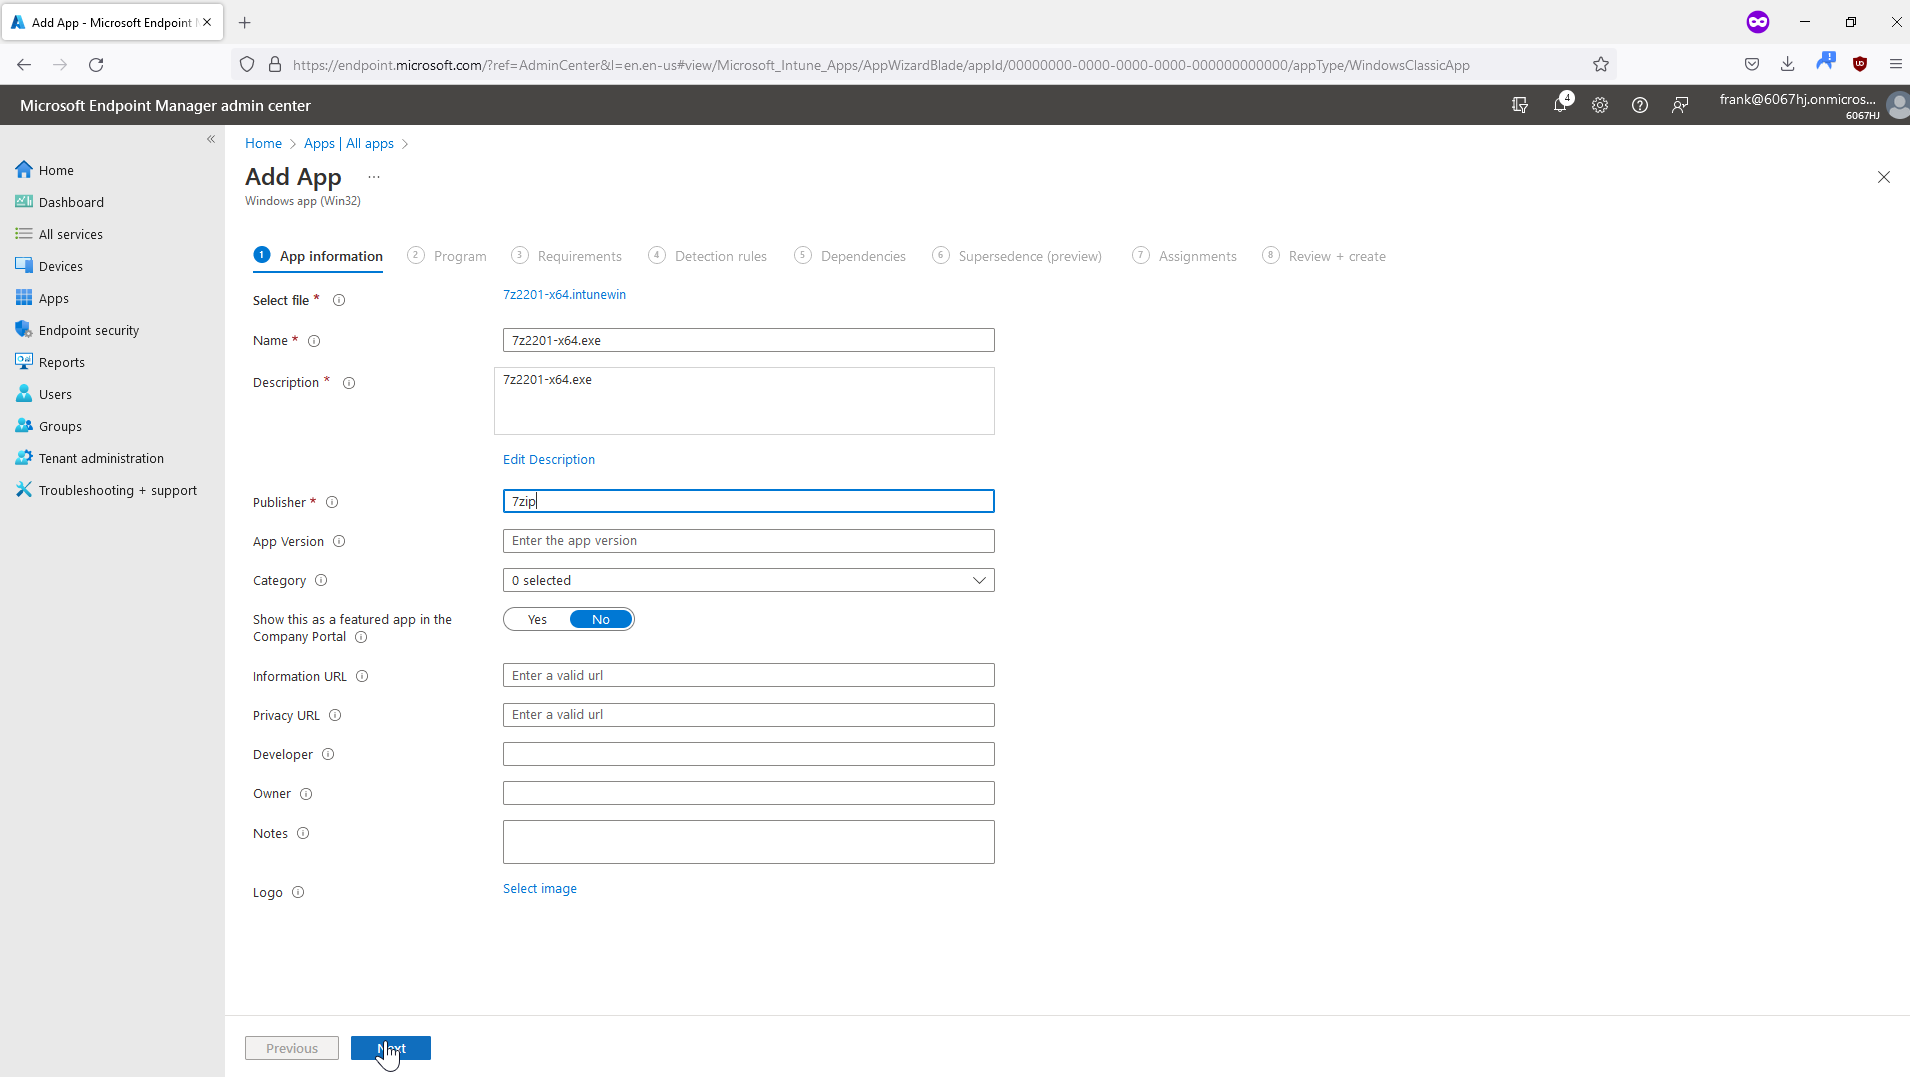
Windows app (Win32)
For this type of app, let’s take an EXE file for installing 7-Zip as an example. With this type, however, a bit of preliminary work must be done. The app must be present with the file extension .intunewin so that a deployment can take place.
The conversion to the appropriate format works via a tool that you can download from GitHub, the Microsoft Win32 Content Prep Tool. We then simply run the IntuneWinAppUtil.exe file and specify the necessary parameters one by one.
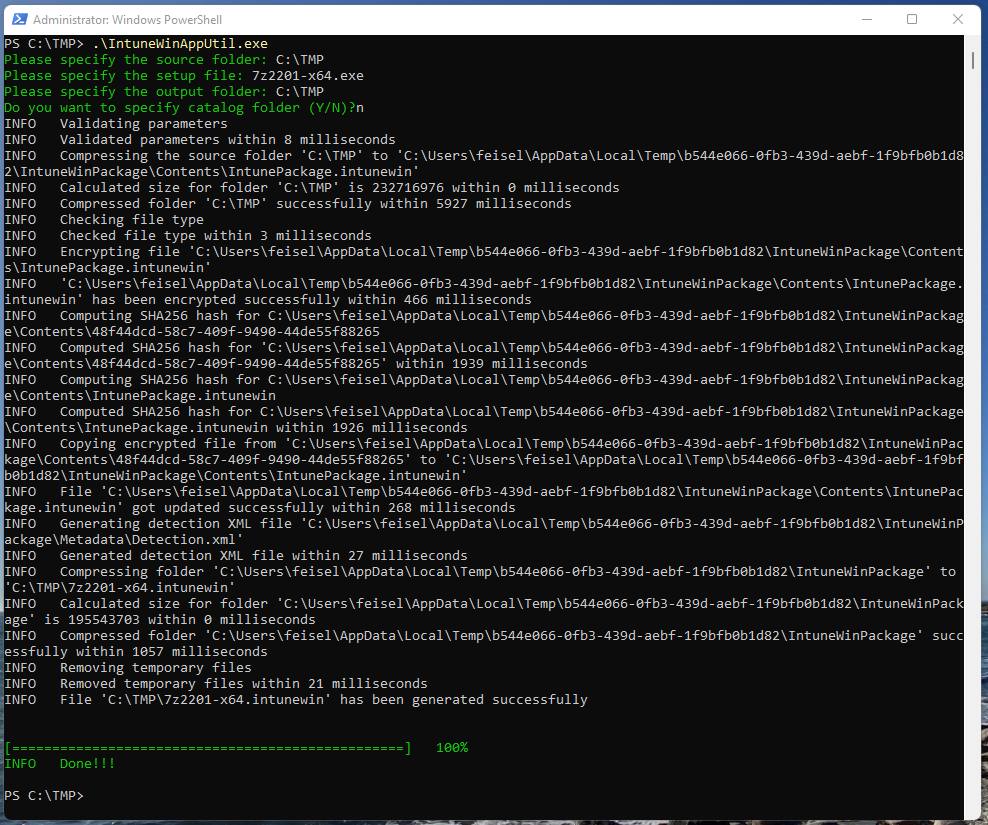
After that, we have created our file with .intunewin extension, and now we can use it in the Microsoft Endpoint Manager portal.
So we add one more app to our deployment.
As with the MSI file in the previous section, we now need to upload our created file.
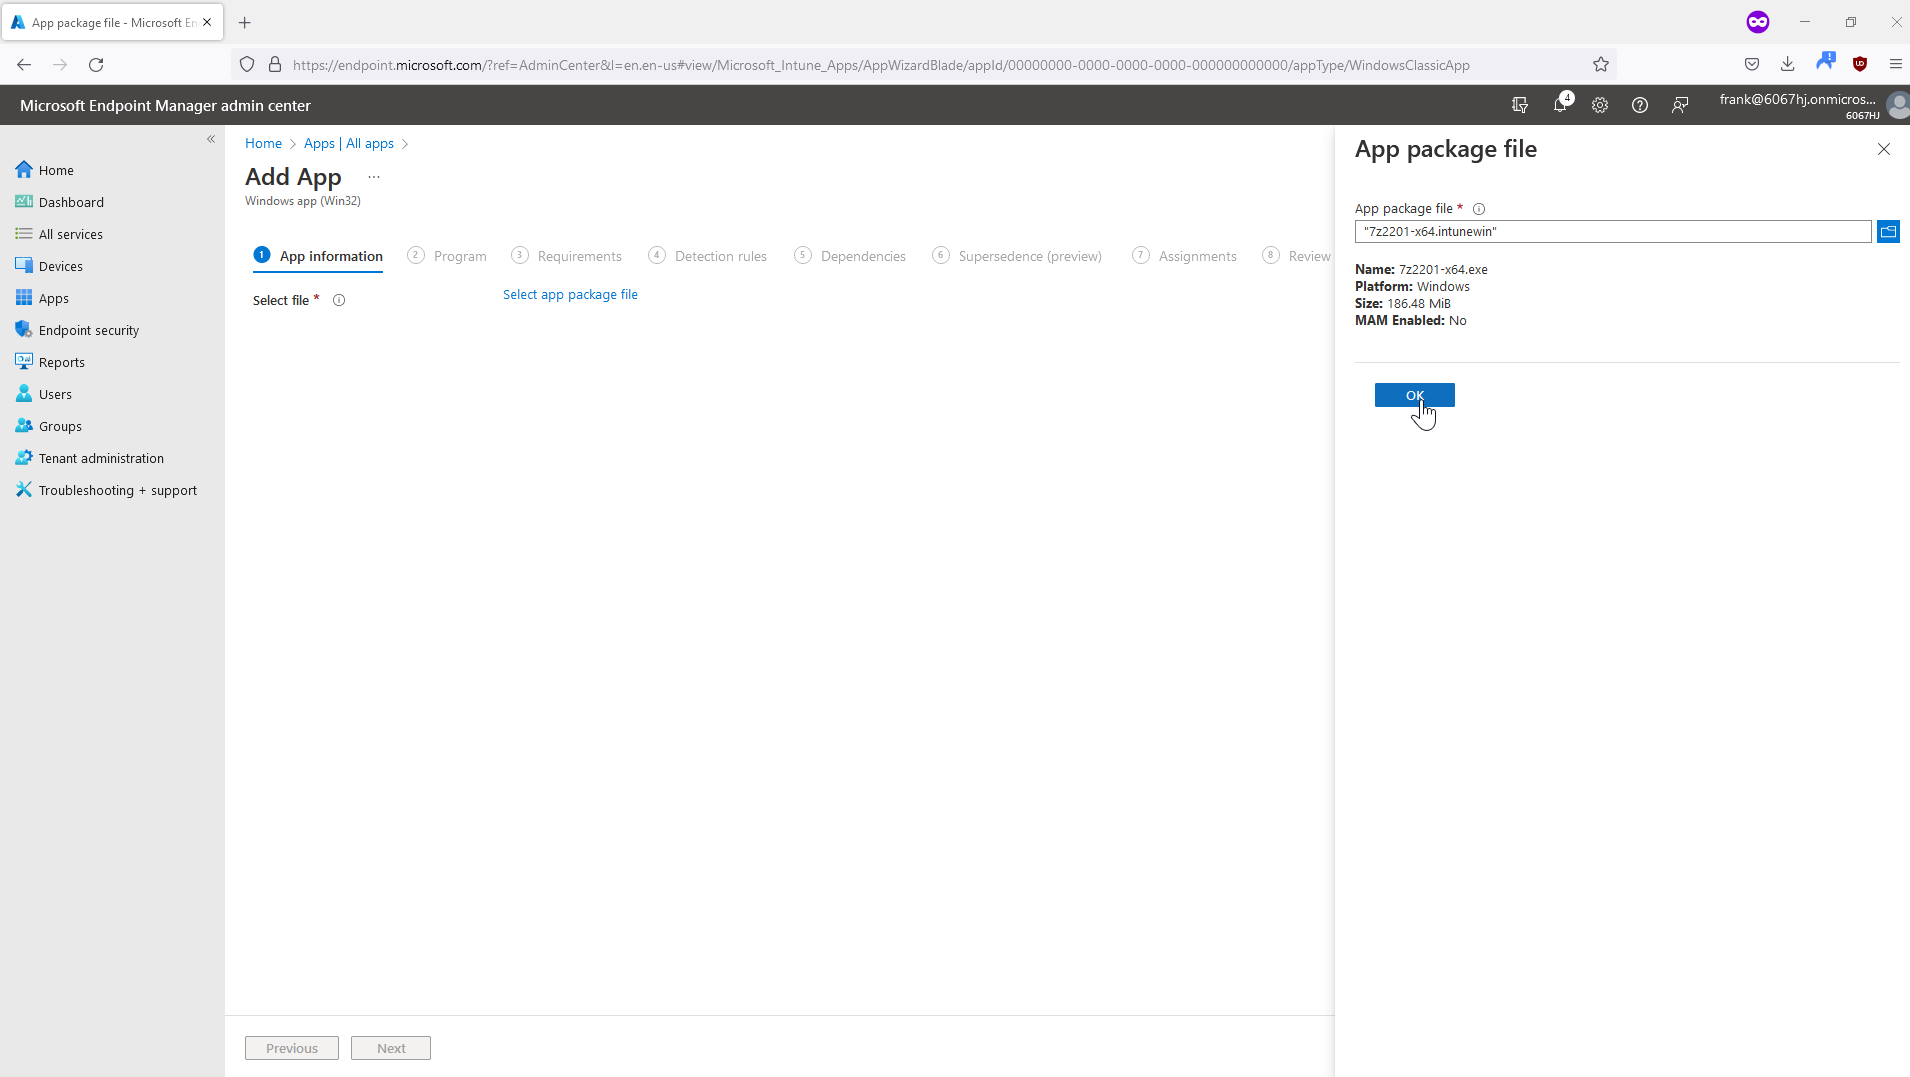
The general app information in the next step is also already known.
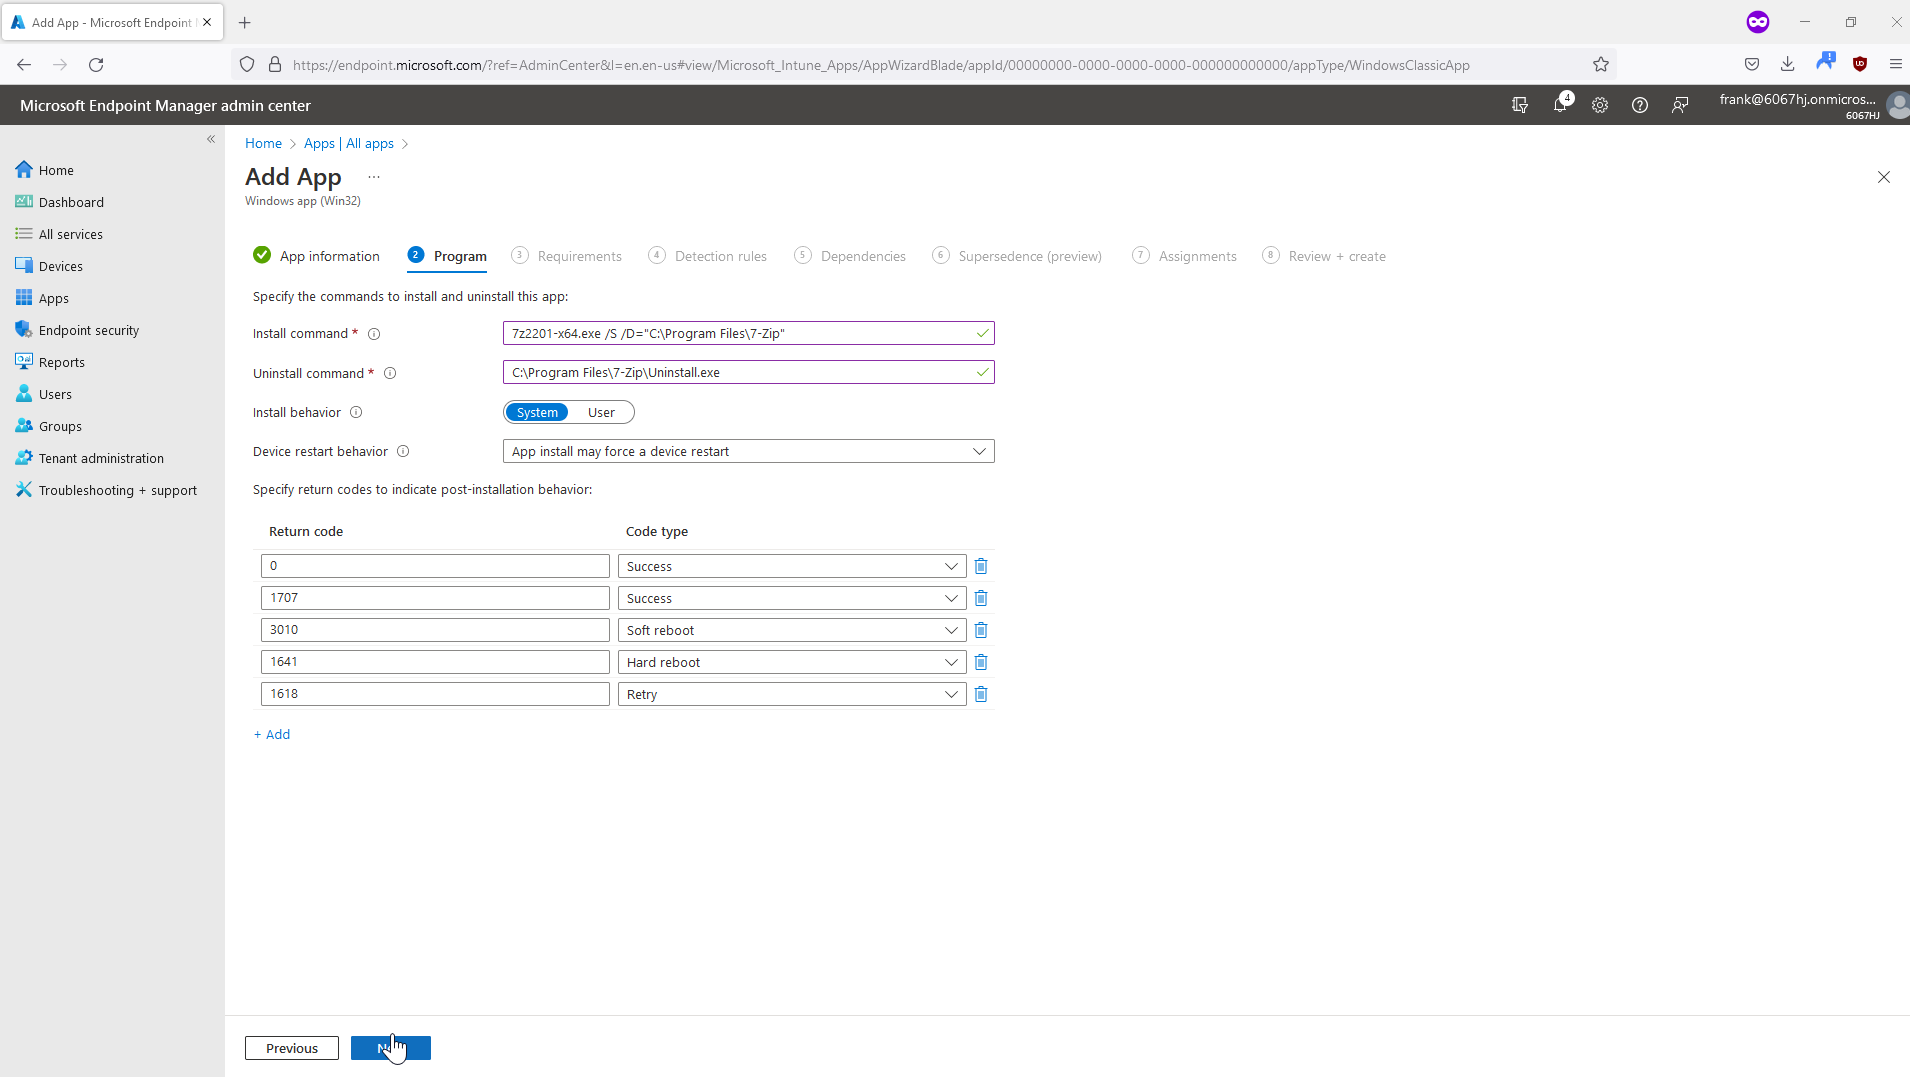
The next input masks are interesting, because here the commands for the installation and uninstallation of 7-Zip are specified. For 7-Zip, the parameter /S stands for silent installation (without prompting, which is advantageous for automatic software distribution) and /D for the installation directory. This is of course different for each program and must be found out before configuration.
The next step is to define the requirements for the program. Here, for example, the necessary free disk space can also be defined. With 7-Zip, however, this is fortunately kept to a minimum.

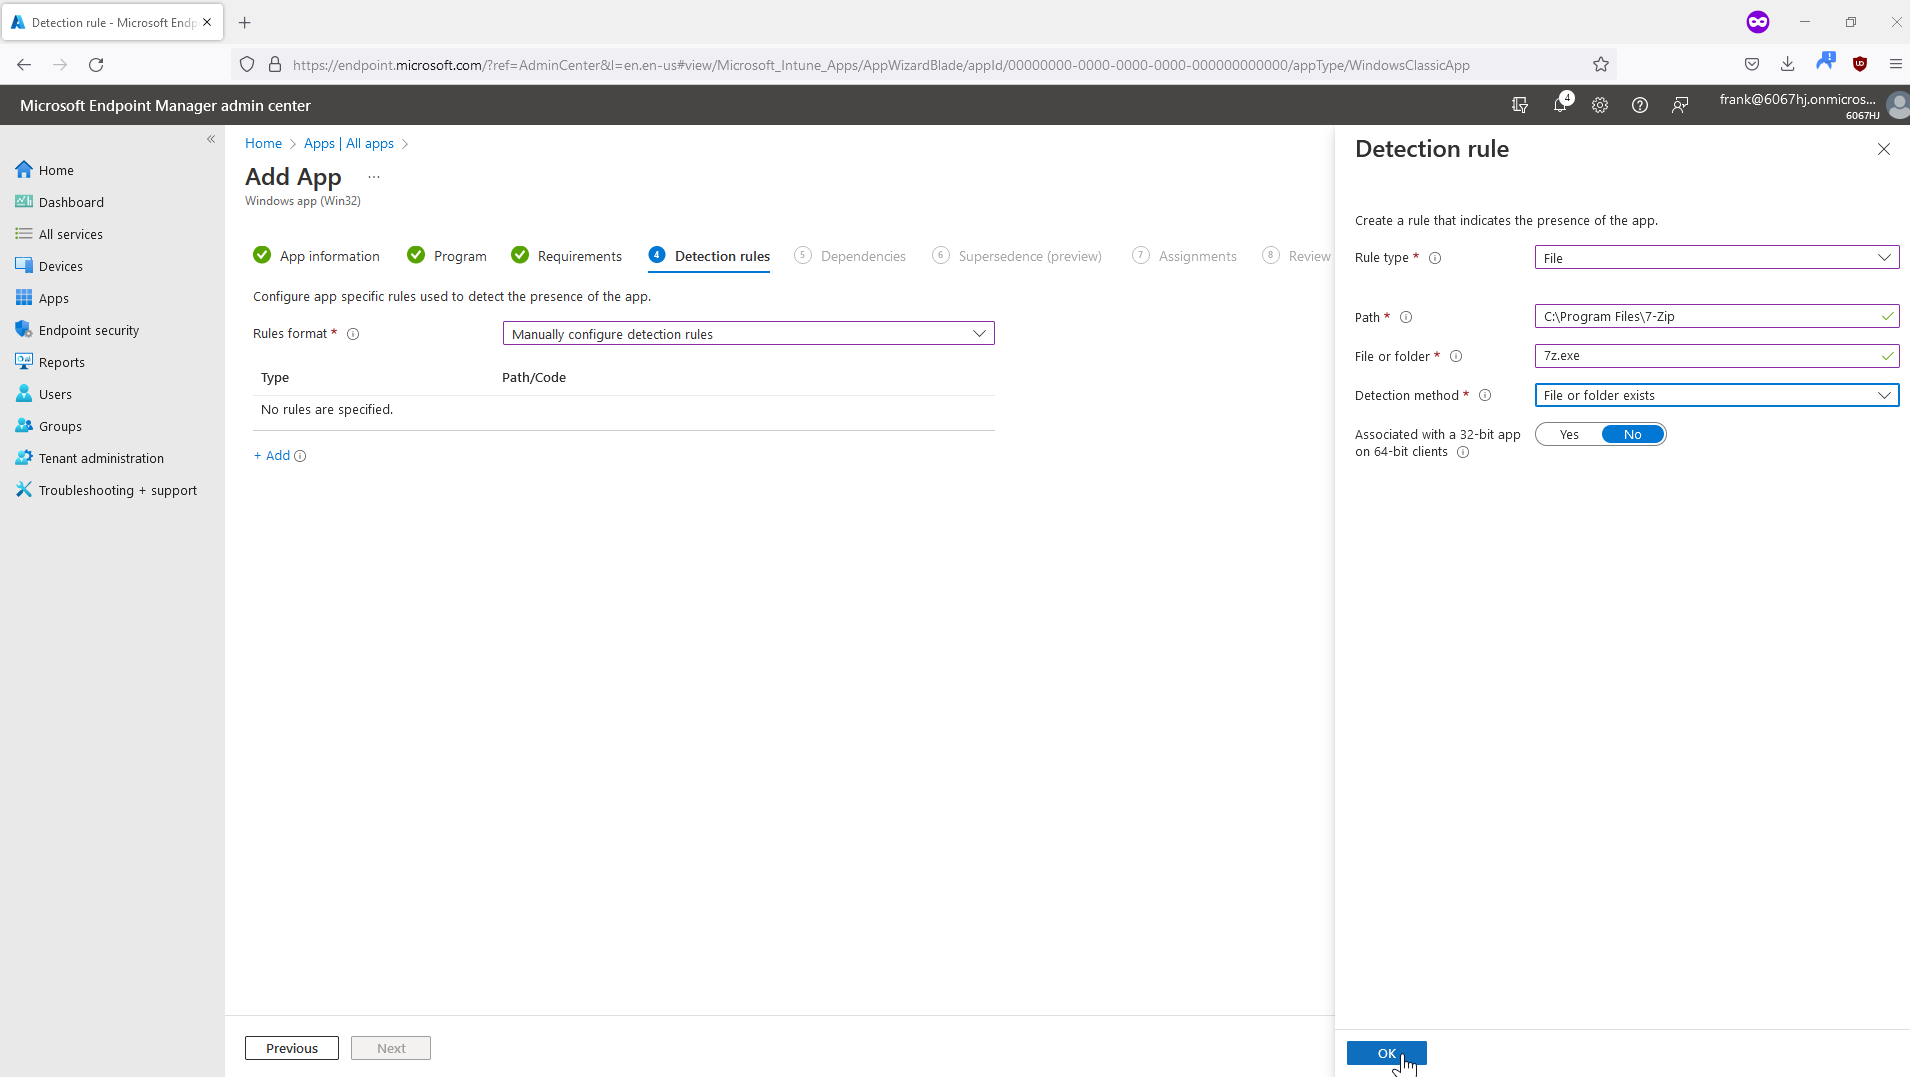
And the last necessary step is to configure how Microsoft Intune can detect that the program is already installed and not try it arbitrarily. In this case, we make the installation dependent on whether the 7z.exe file is present or not.
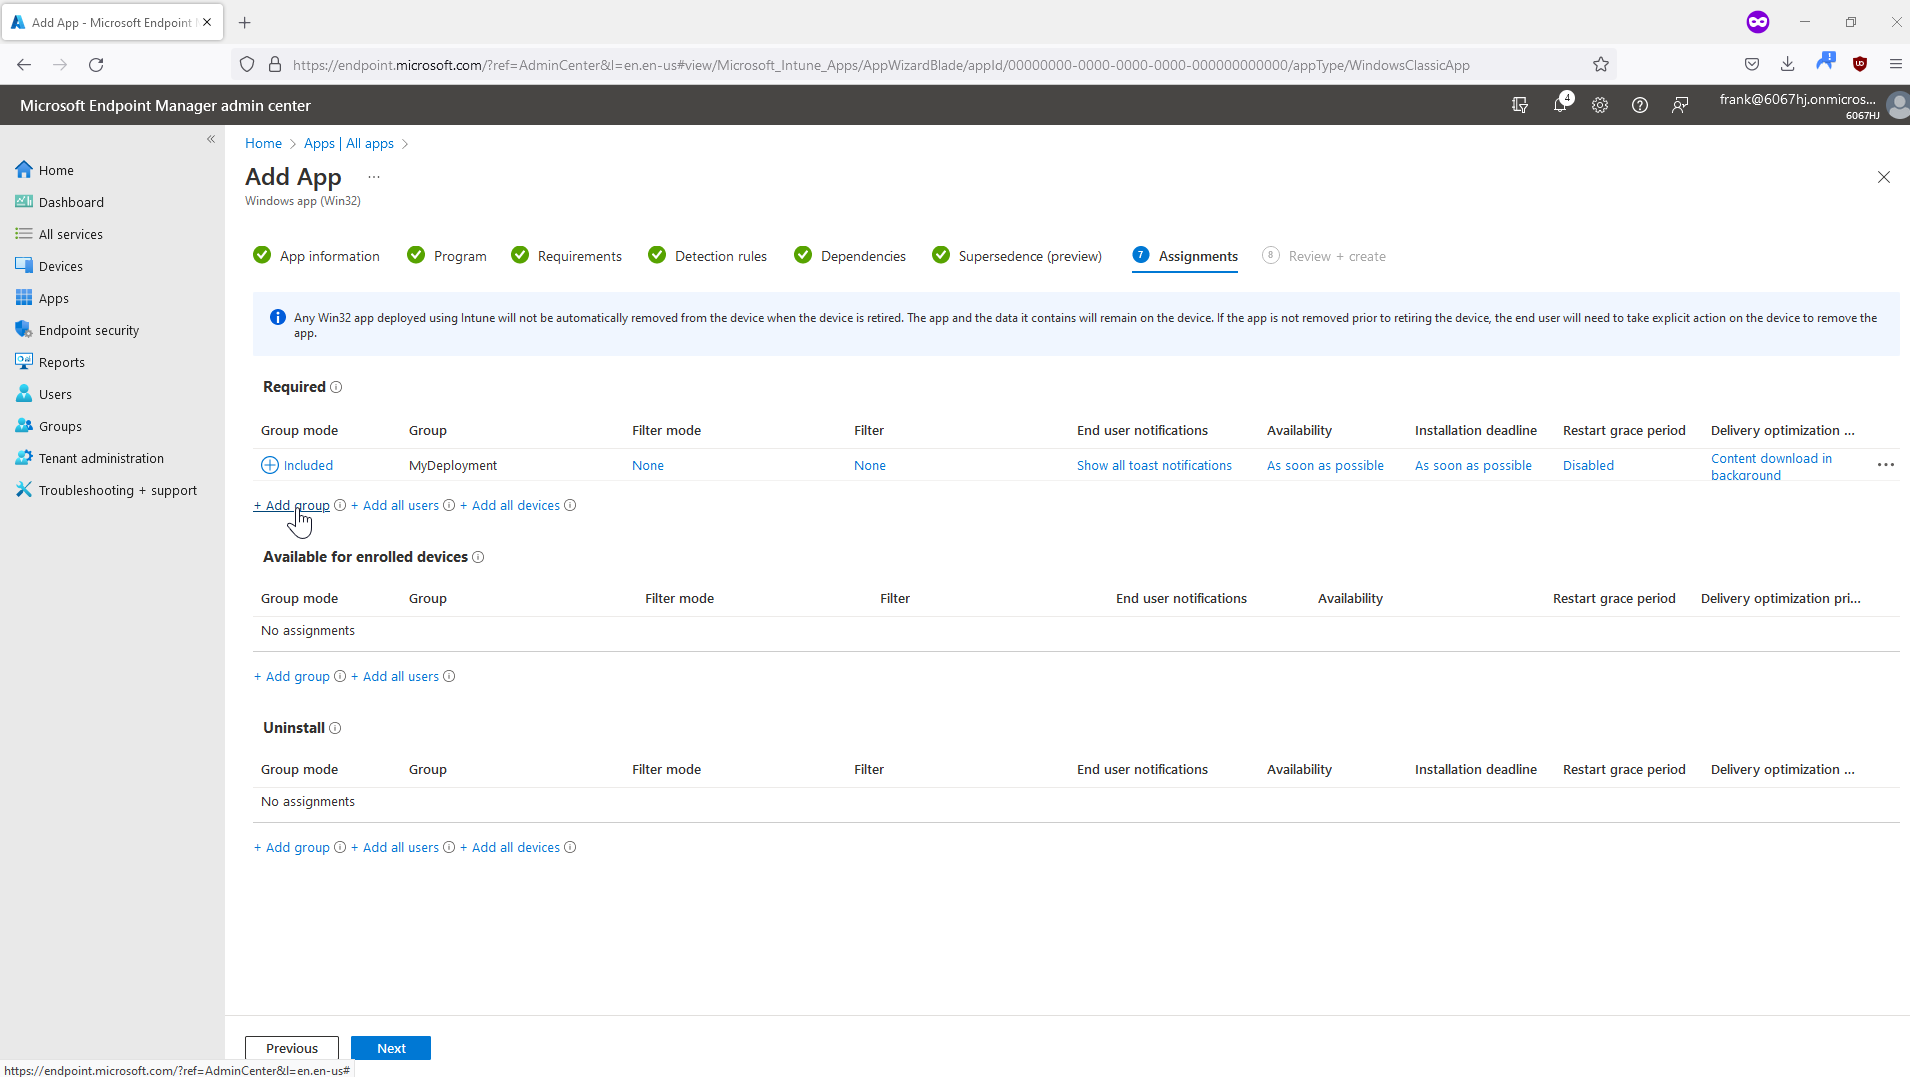
As a final step, of course, the app must be assigned to users or devices again.
And before creating the app, there is again a summary of our performed configuration.

After the app/file has to be uploaded first, it can take a short moment until the provisioning is done.

And there you go, 7-Zip is also present on our clients.
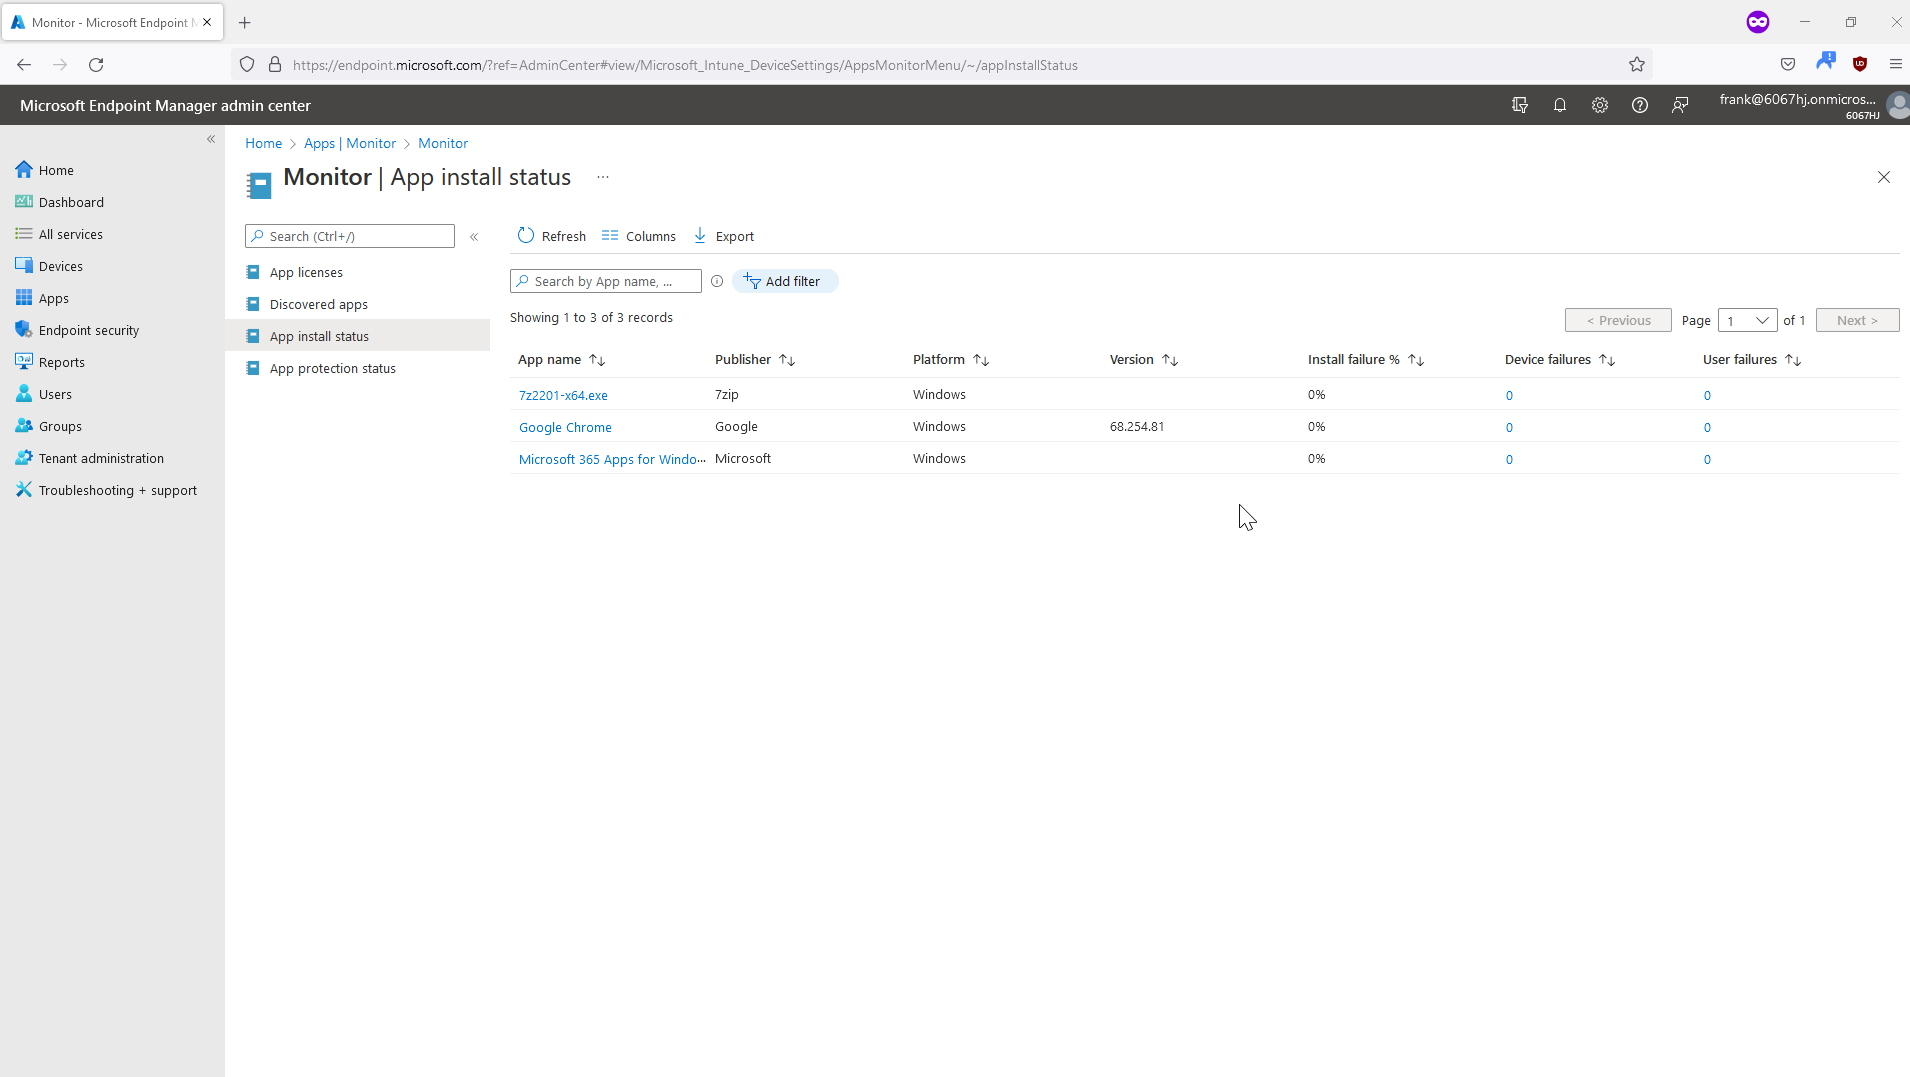
These types of apps can also be displayed via the company portal app. All installed programs of this type are displayed there.
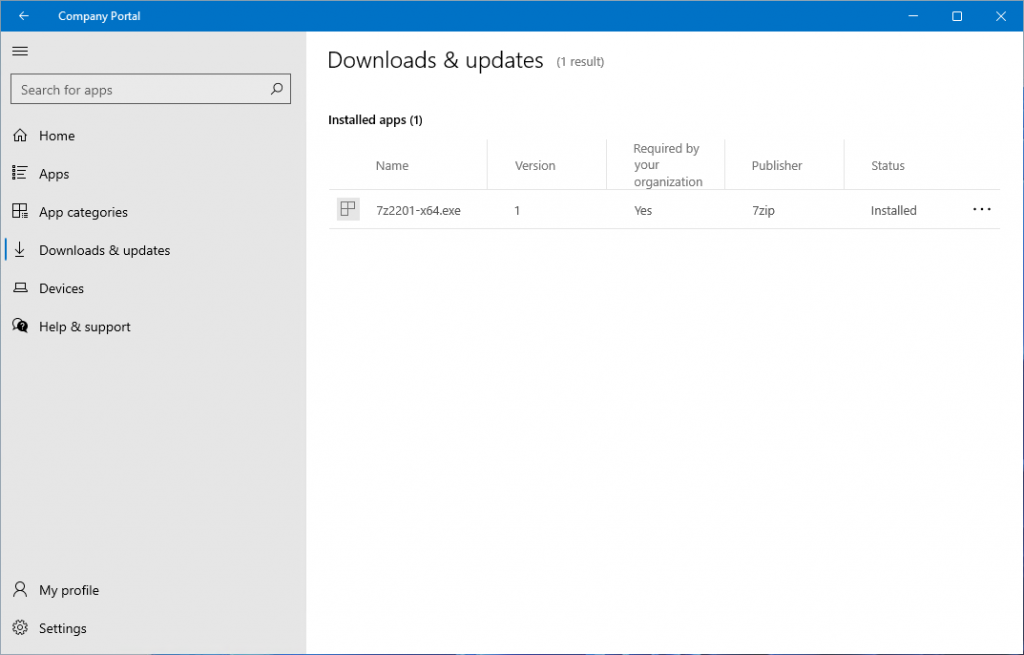
Of course, Microsoft Endpoint Manager also offers a corresponding management, where you can detect performed or faulty installation of apps. In our simple example, everything worked and there are no errors.
But what if you want to distribute something else entirely to the clients? Of course, there is a solution for that, too, and that is PowerShell.
PowerShell Scripts
It is not only possible to do software distribution with Microsoft Endpoint Manager, but it is also possible to run PowerShell scripts on the clients. However, this point can be found in a different place, like the software distribution of the apps.
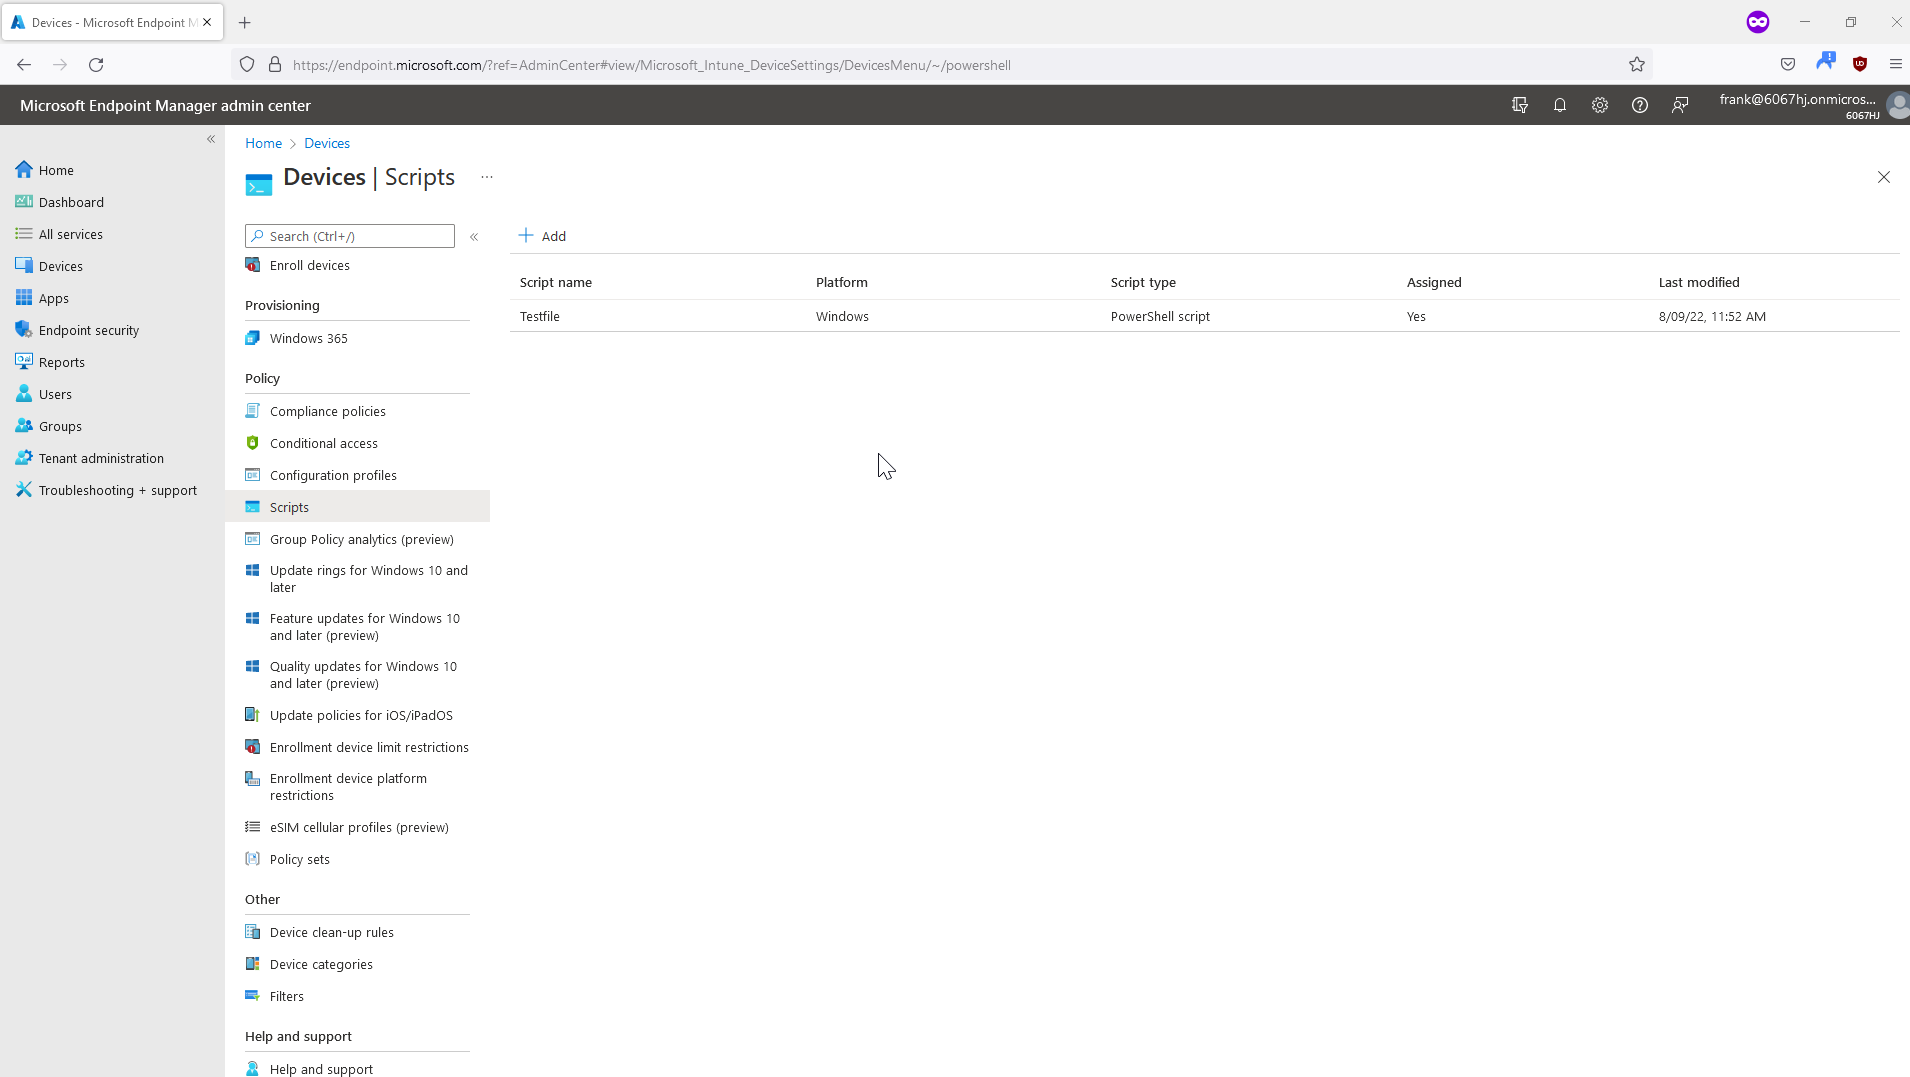
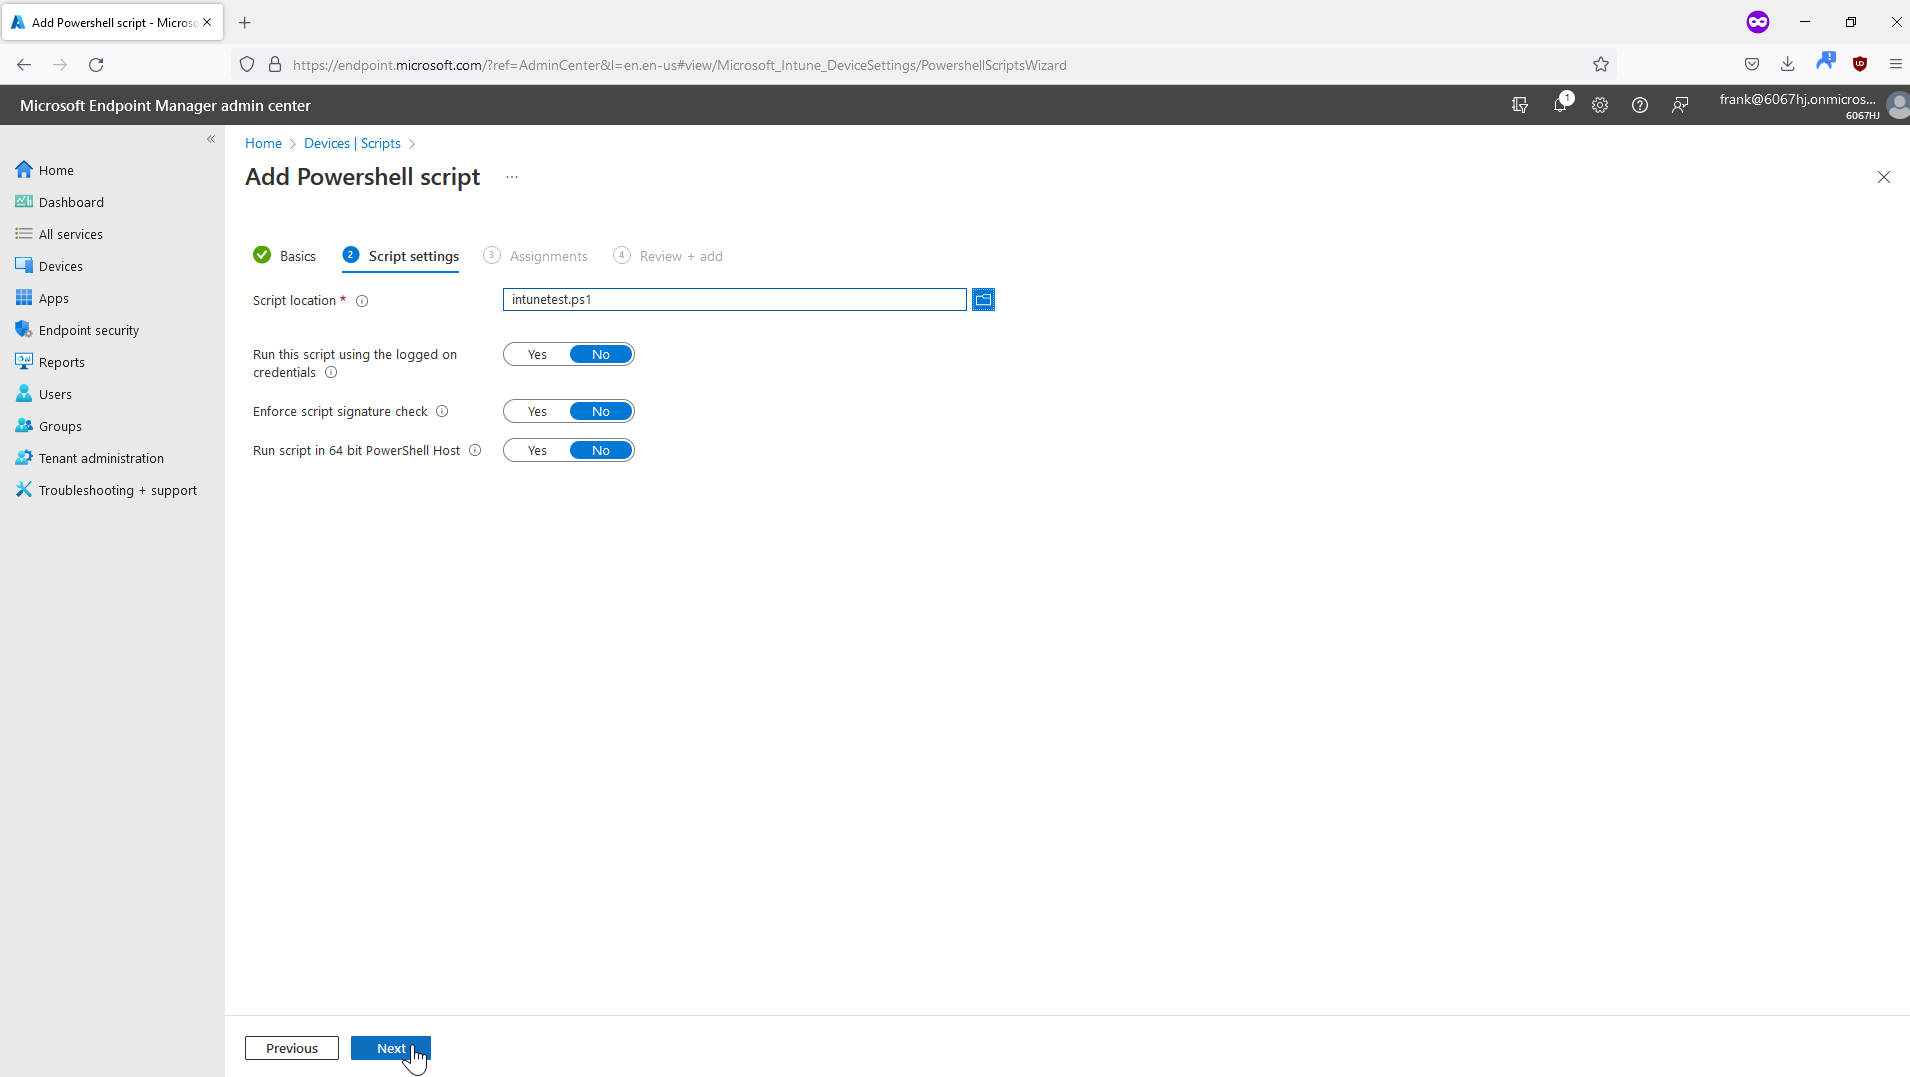
There, you can upload ready-made PowerShell scripts that will be executed when the user logs in. Of course, you have the possibility to execute the scripts with admin rights, even if the user does not have them on the client.
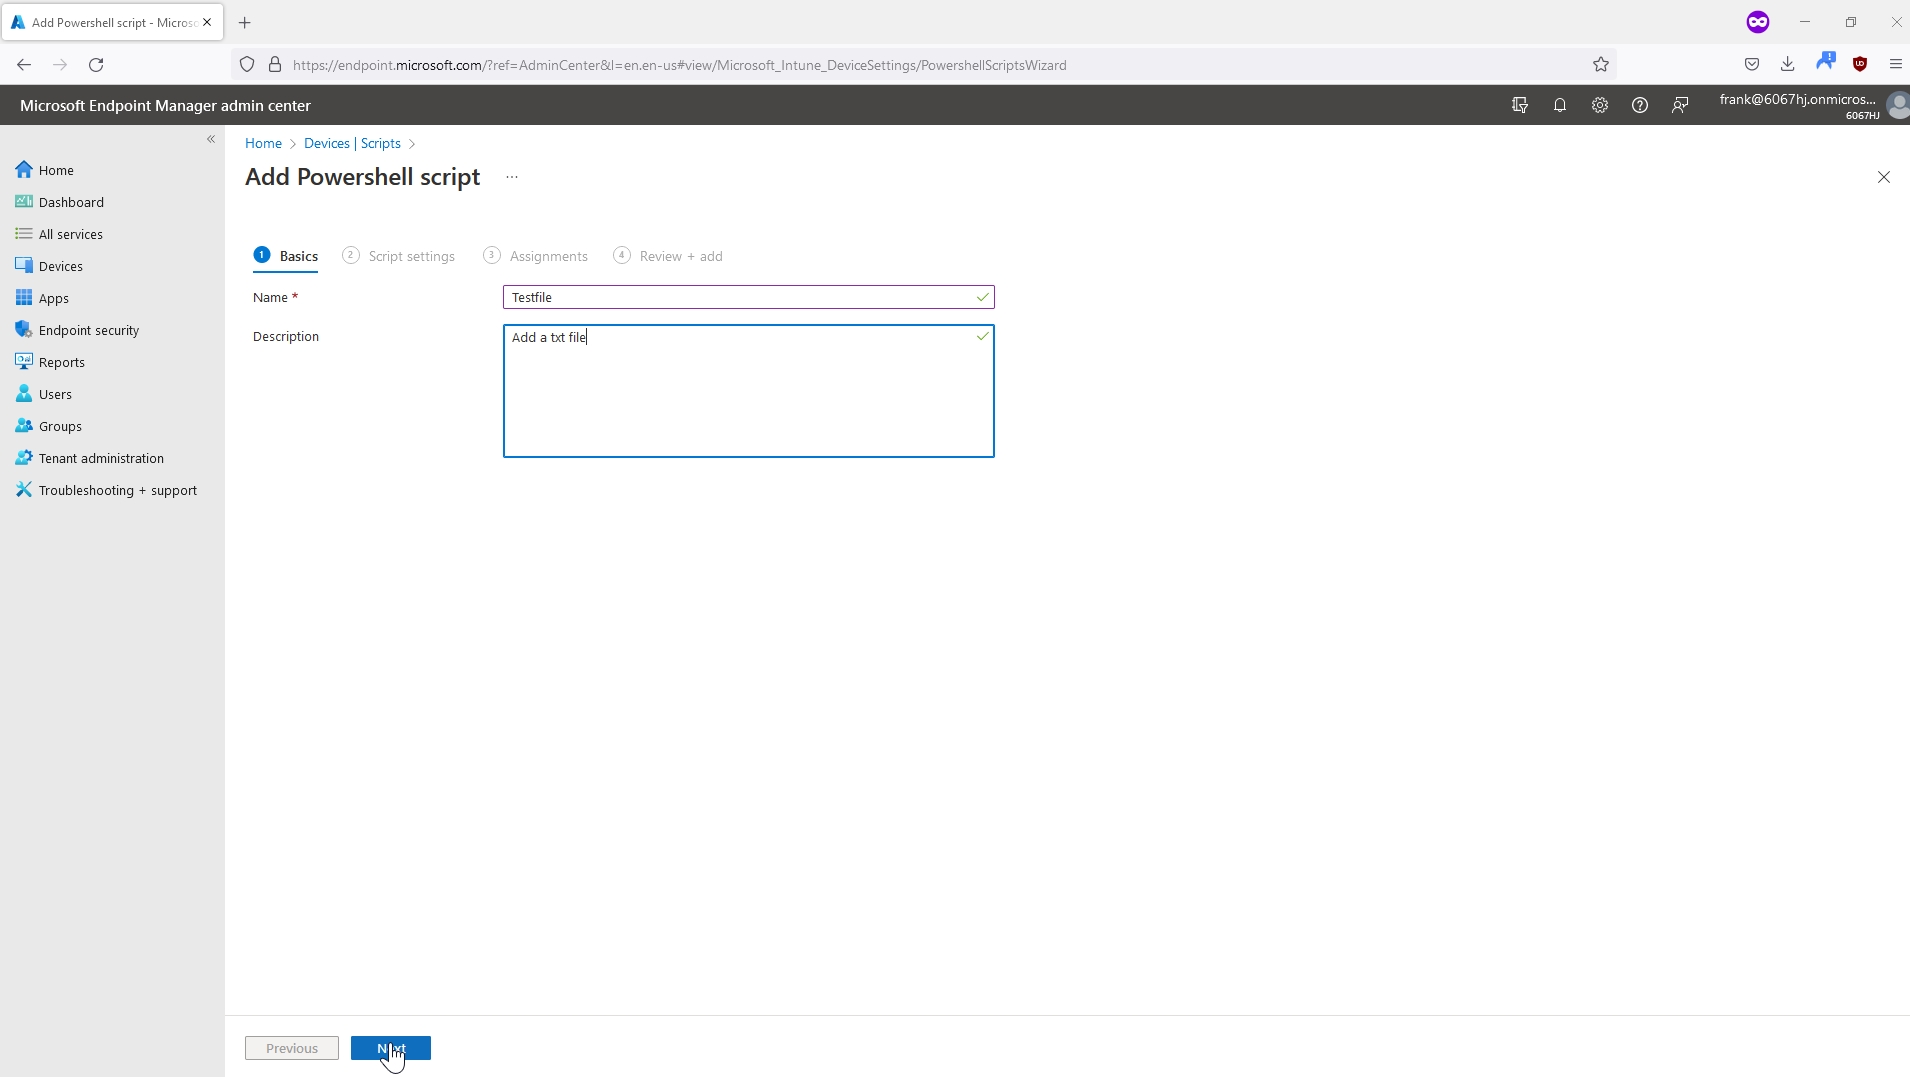
And as should already be known by now, the last step is to make an appropriate allocation.
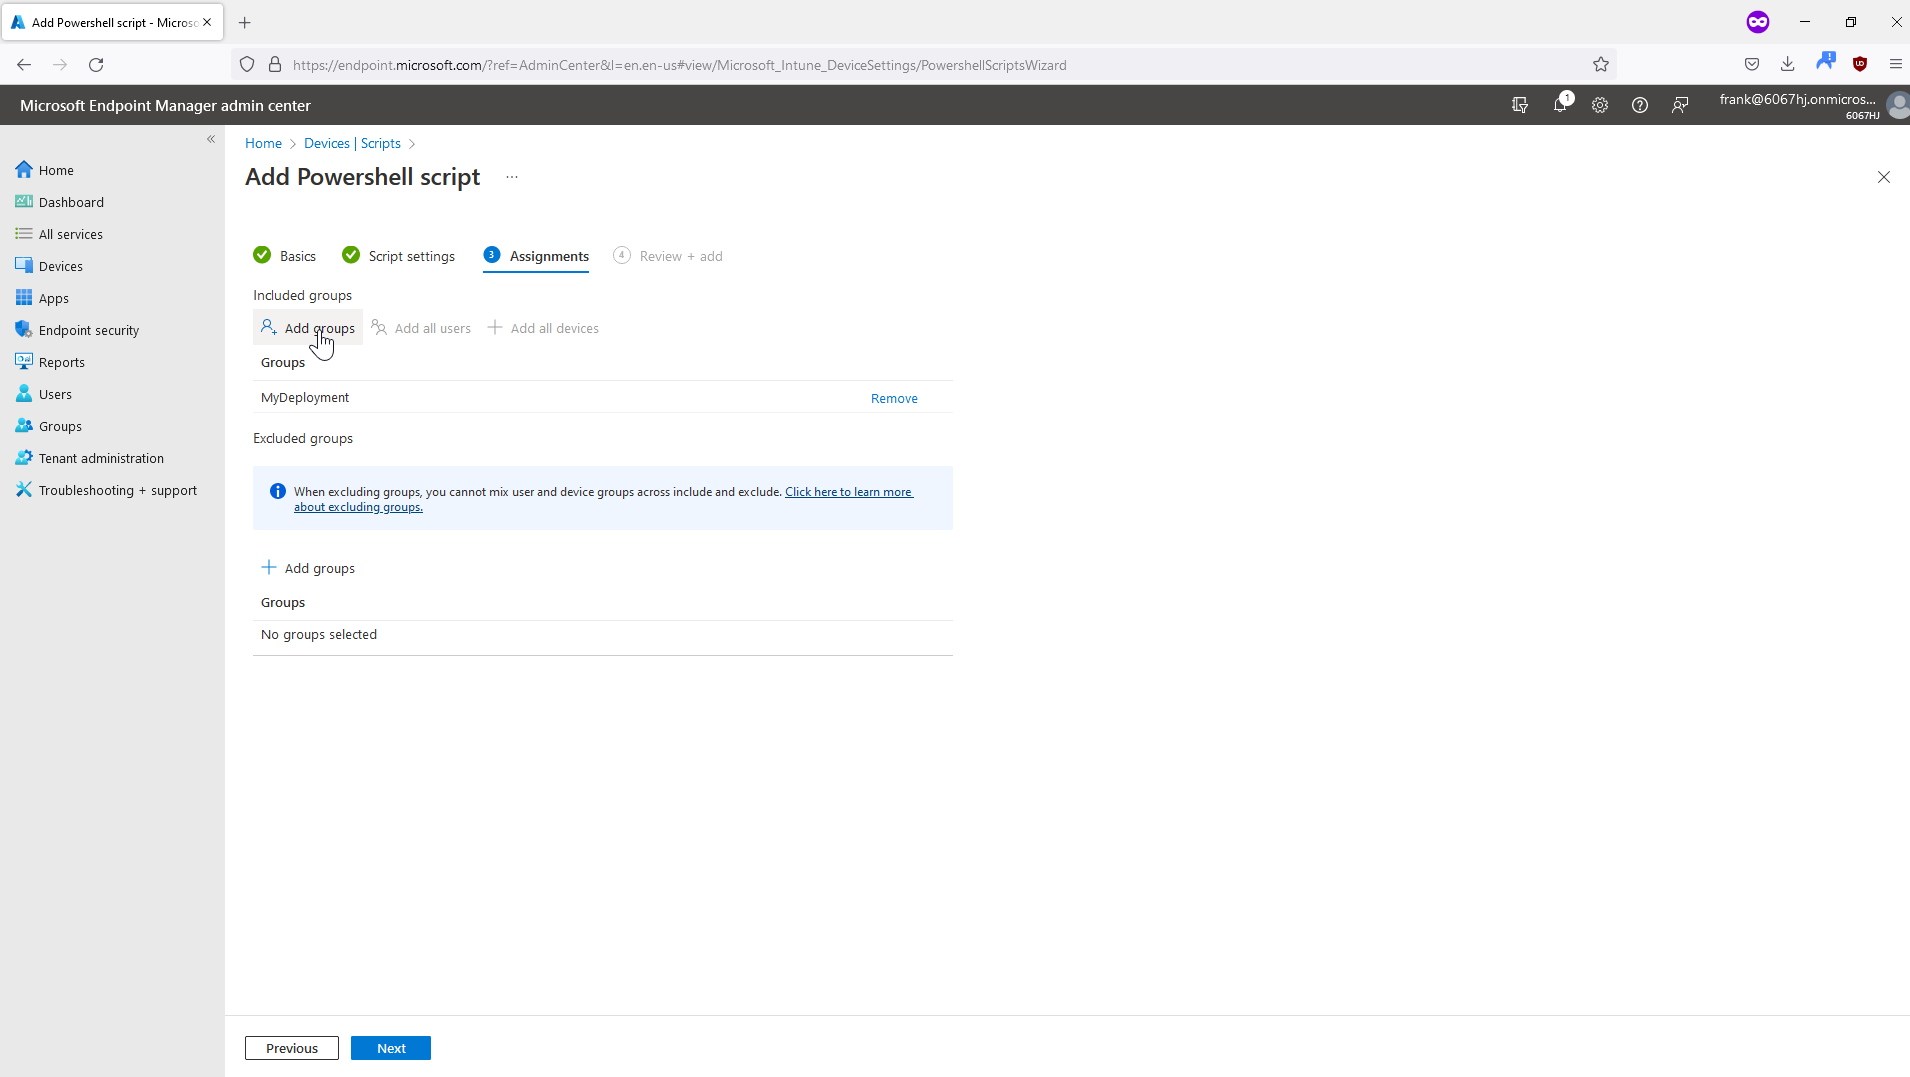
And already the PowerShell scripts are executed on the clients.
I hope that the examples shown here give you a good insight into software distribution with Microsoft Endpoint Manager.
[…] Dieser Artikel ist auch in englischer Sprache verfügbar […]